Free tutorial · Lesson 2 of 6
How to Draw Anime Expressions — Happy and Surprised
Draw two versions of the same character: happy on the left and surprised on the right. Learn how eyes, brows and mouth work together to change an expression.
Skip to the stepsWatch the pencil strokes
Free replay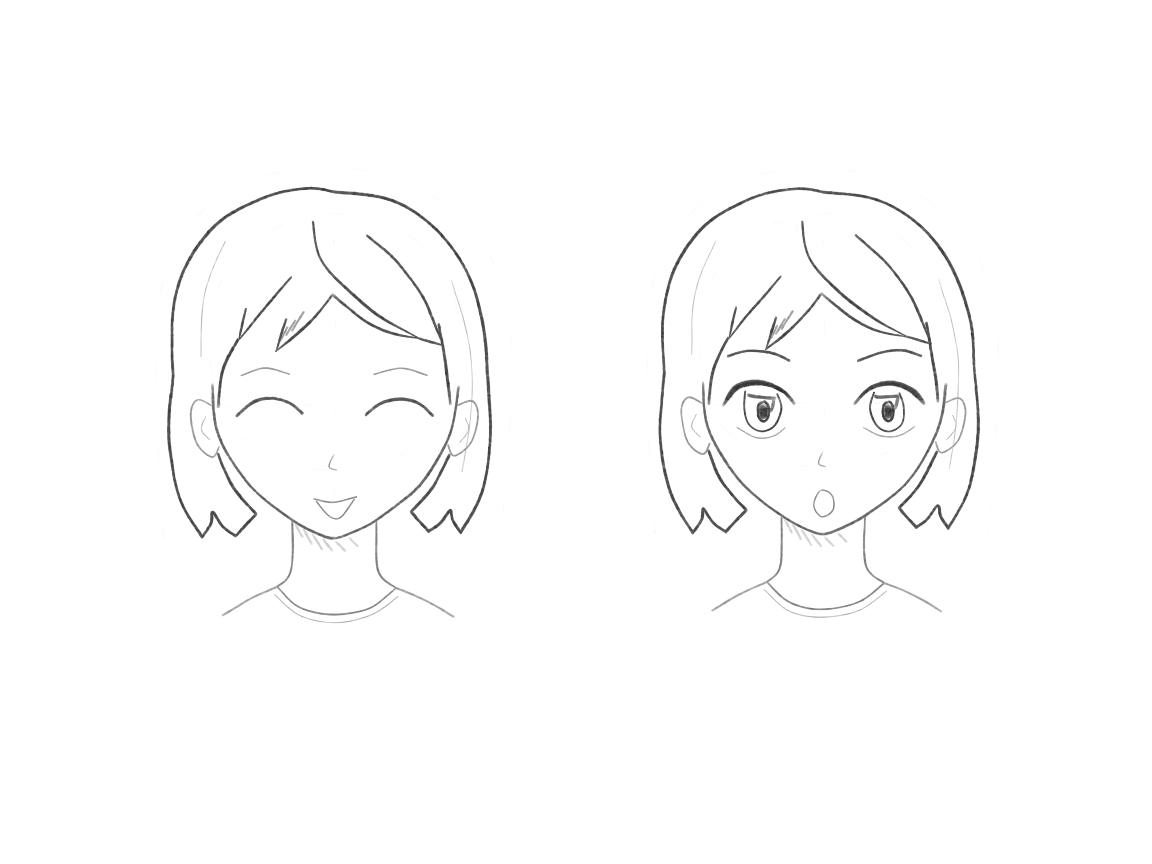
Enable JavaScript for the pencil replay. All drawing steps are available below.
What you’ll learn: Eyes, brows, and mouth work together to change a fictional character's expression while the underlying head design stays broadly consistent.
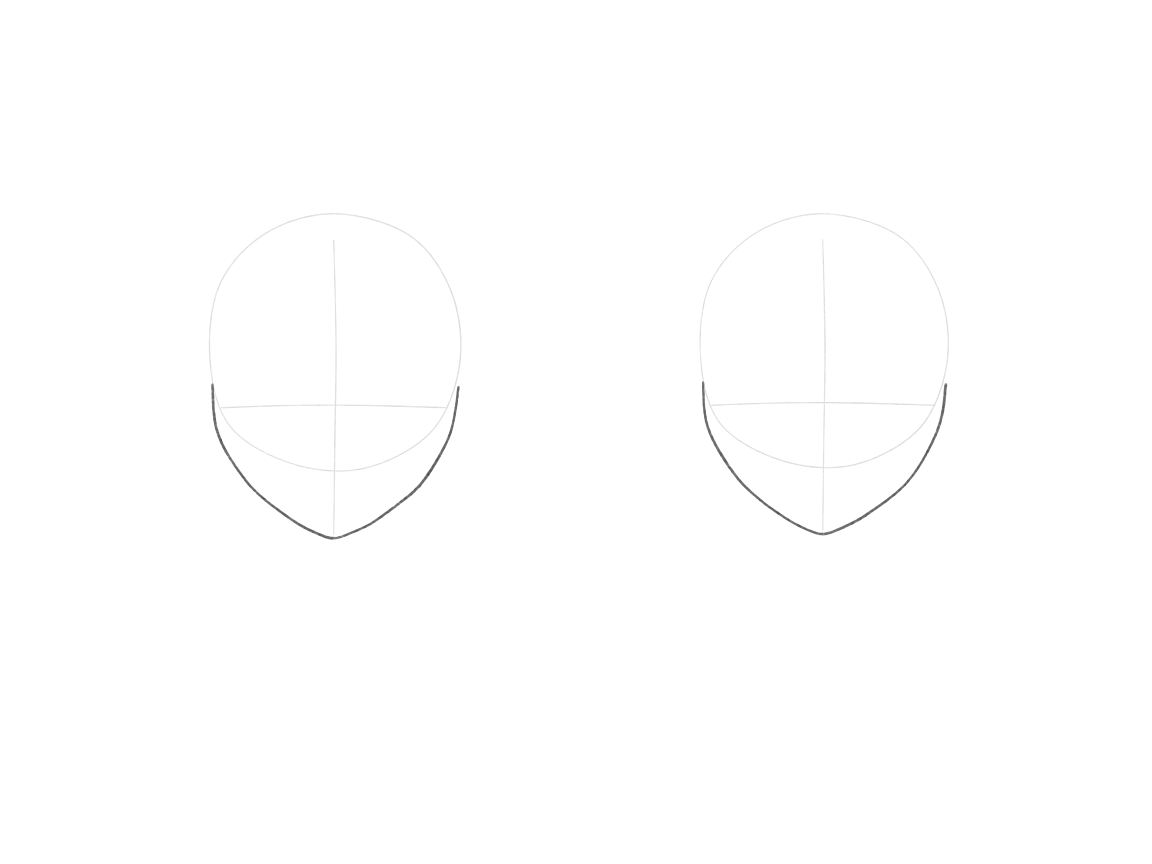
Plan the pair before adding expressions
Set up two heads at a similar size. Give each a centerline and an eye guide. Keeping the basic plan similar will make the expression changes easier to compare.
Place the happy head on the left side of the drawing and the surprised head on the right. Make both skulls and jaws first, with a clear gap for their hair. Add a centerline and eye guide to each. Small size differences are fine if both faces have usable space.
Why this works
A similar starting frame makes the expression changes easier to compare.
+ Green: add− Red: erase
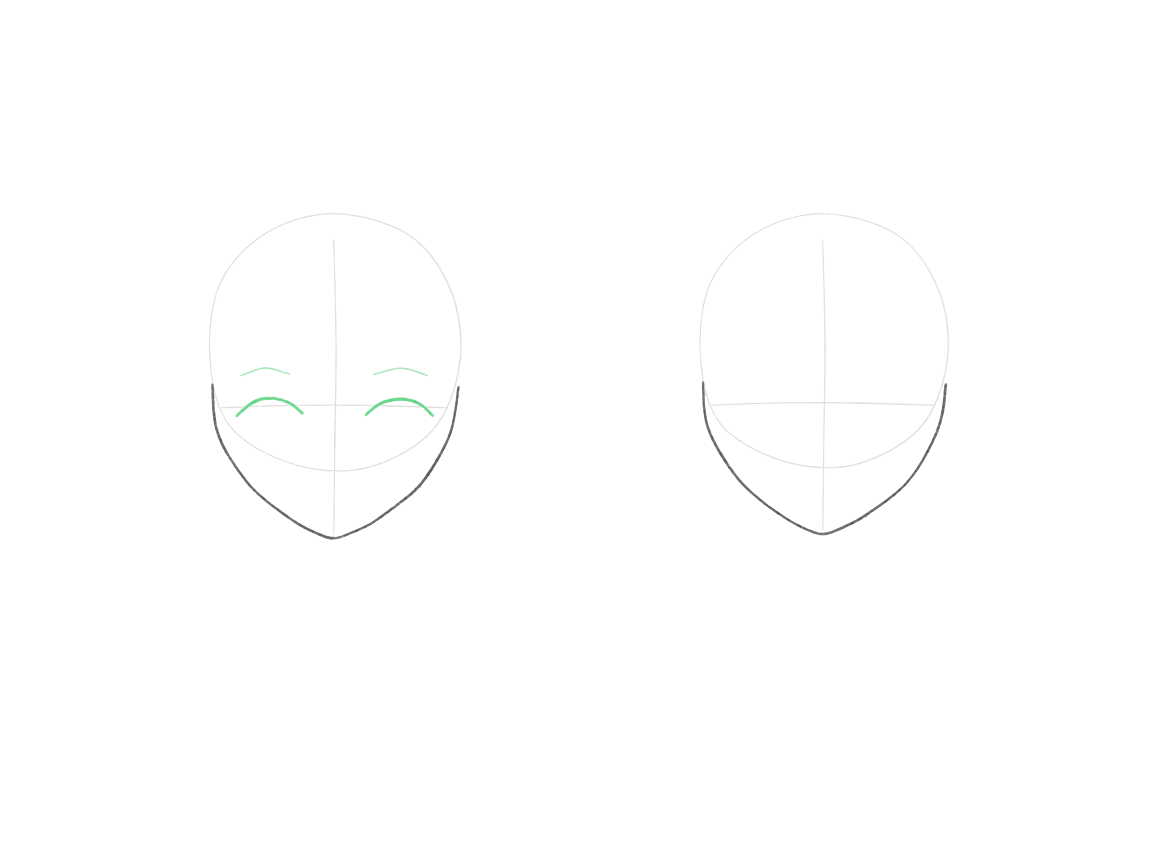
Draw the happy eyes and brows
For the happy face, curve the closed eyes upward and keep the brows relaxed. You do not need pupils when the eyes are closed. Keep the pair positioned on the head guide.
On the left head, draw two upward-arching closed-eye curves and relaxed brows above them. Compare their placement against the guide. These eyes are closed, so leave out irises and pupils. Keep the right head as a light scaffold for now.
Why this works
Closed eyes need no visible pupils. The lid curve and brow placement carry their part of the expression.
+ Green: add− Red: erase
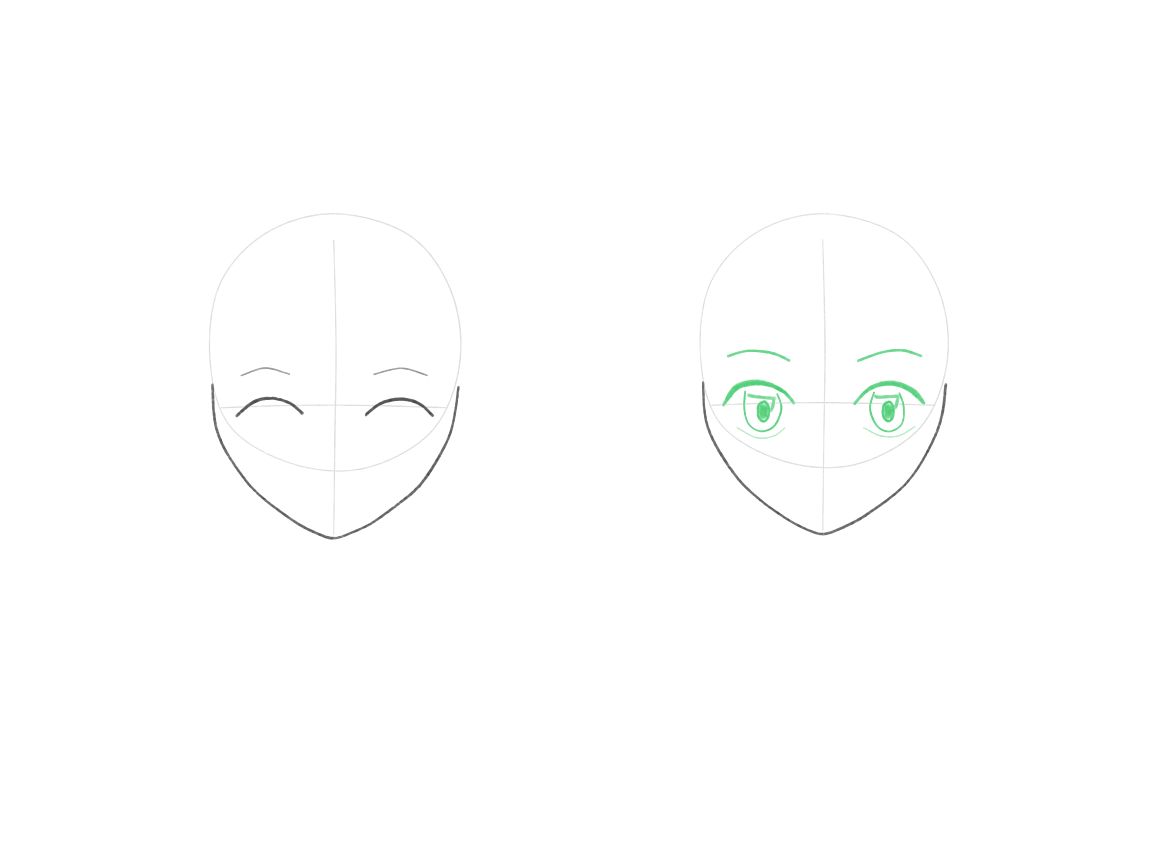
Open the surprised eyes and raise the brows
Open the second pair of eyes a little wider and lift the brows. Keep the eyes connected to the same head plan—an expression changes the features, not their basic place on the face.
On the right head, place two open eye shapes before adding their simple dark centers. Raise the brows a little more than on the happy head. Keep both eyes within the cheeks. The difference should come from their expression, not from moving the features off the face.
Why this works
Wider openings and raised brows can change the drawn expression while leaving the face structure intact.
+ Green: add− Red: erase
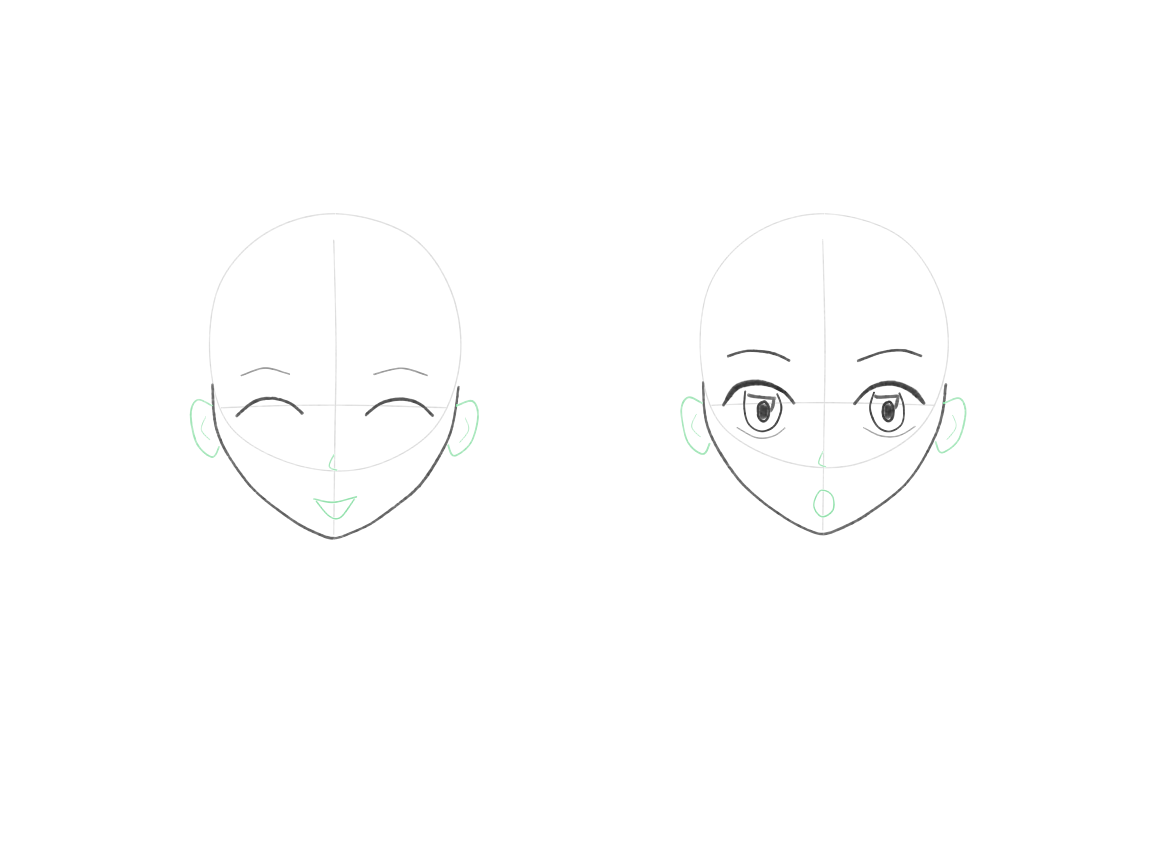
Let the mouths complete the contrast
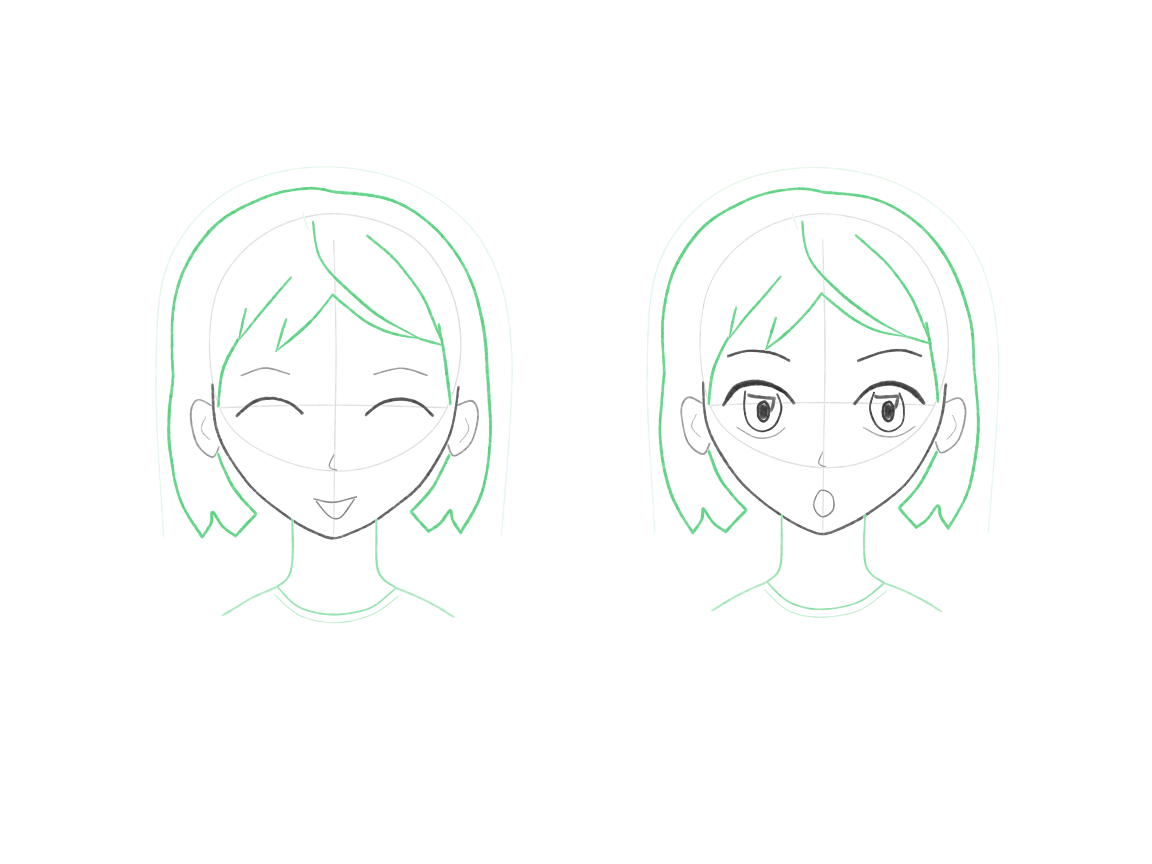
Give the happy face a simple smile and the surprised face a small rounded mouth. Check the eyes, brows, and mouth together. A change to just one feature is not always enough to explain the intended expression.
Add a small nose to each face. Give the left head a simple smile and the right head a small rounded mouth. Keep both mouths above their chins. Check eyes, brows and mouth together: the combination should explain the contrast without teeth, tears or other effects.
Why this works
The mouth completes a feature combination. Changing one isolated mark may leave the expression ambiguous.
+ Green: add− Red: erase
Repeat the hairstyle without copying pixels
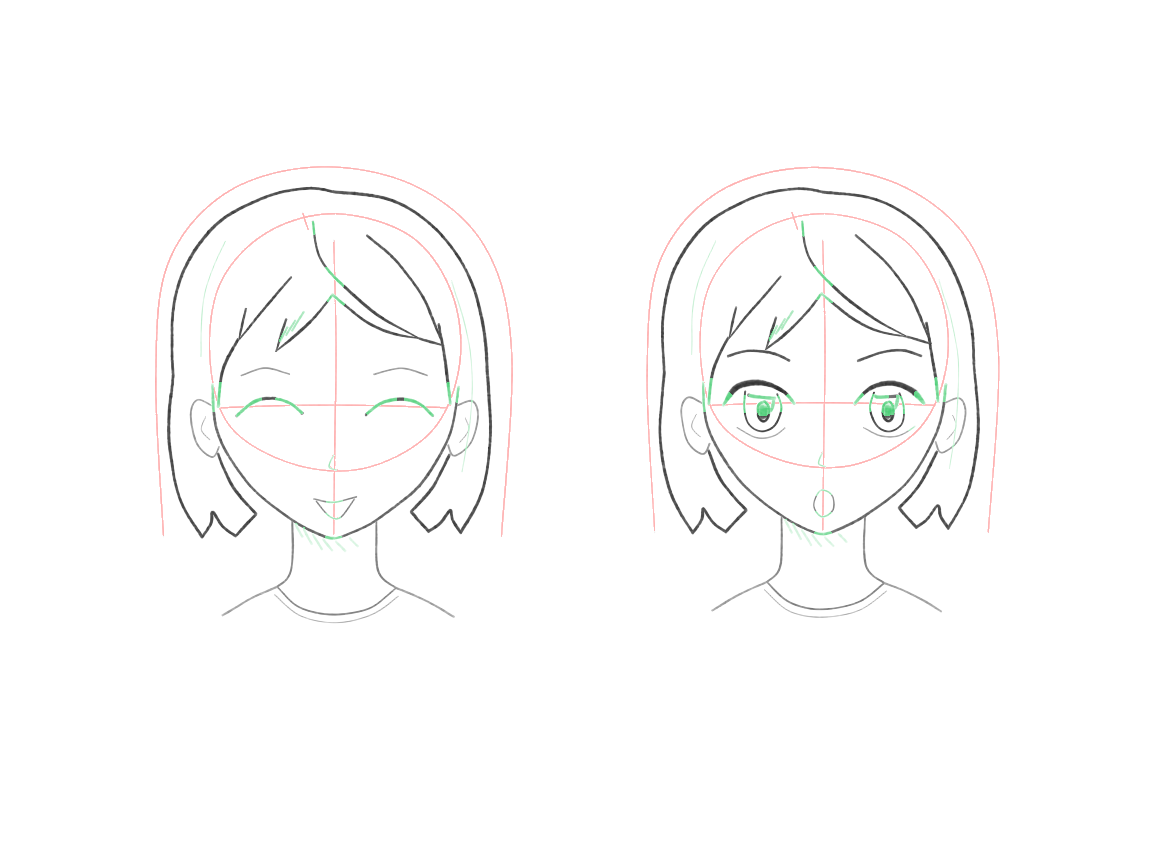
Build the same basic haircut around each skull: the part, broad bangs, and side shapes. It does not need to match strand for strand. Keeping a few recognizable design features is enough.
Build a bob around each skull, beginning with its outer volume and broad front sweep. Draw both independently; reuse the construction idea rather than trying to match every lock. Add short necks and simple collars. Keep the two different expressions visible.
Why this works
Repeating a construction does not require matching pixels. A few stable design features keep the heads related.
+ Green: add− Red: erase
Clean, emphasize, and compare
Clean the unused guides and emphasize a few important lines. Compare the pair: the hairstyle and head still belong together, while the eyes, brows, and mouths tell different stories.
Remove the used guides after both heads have their features and hair. Repair any short final lines touched by the eraser. Strengthen only a few useful edges and compare the expressions again. Closed eyes are finished without pupils; light shading is enough for either head.
Why this works
Compare the faces together before adding detail. Cleanup should preserve the contrast you built.
A few useful checks
- If you see this problem: Leave a clearer gap between the heads before adding hair. Shift the unfinished outline slightly so both faces have room.
- If you see this problem: The surprised mouth is touching the chin line. Move the small opening up into the lower face so it reads as a mouth rather than a gap in the jaw.
- If you see this problem: Keep the bob around the skull shape on the second head; its top currently crosses through the eye area.
Try a small change
On a small new head scaffold, try a calm or concerned expression using the same hair. Make it a quick feature study, not a third polished portrait. Do not claim all cultures or people use these marks identically.
A few related changes can give a familiar character a different expression. Next, you will build a hairstyle from larger shapes instead of drawing it strand by strand.
Guided lesson
You’ve followed the steps. Now find out how it went.
In the Draw Anime Characters course you draw this one and 5 more on our canvas, with Luna checking each step: what’s off, how to fix it, before you move on. Pay once and the lessons stay in your account.
More from Draw Anime Characters