Free tutorial · Lesson 5 of 6
How to Draw an Anime Upper Body — Neck, Shoulders, and a Simple Shirt
Give your anime character a body to go with the face. Start with the chest, shoulders and arms, then draw a simple shirt around them. You’ll add the face and hair once the body is in place.
Skip to the stepsWatch the pencil strokes
Free replay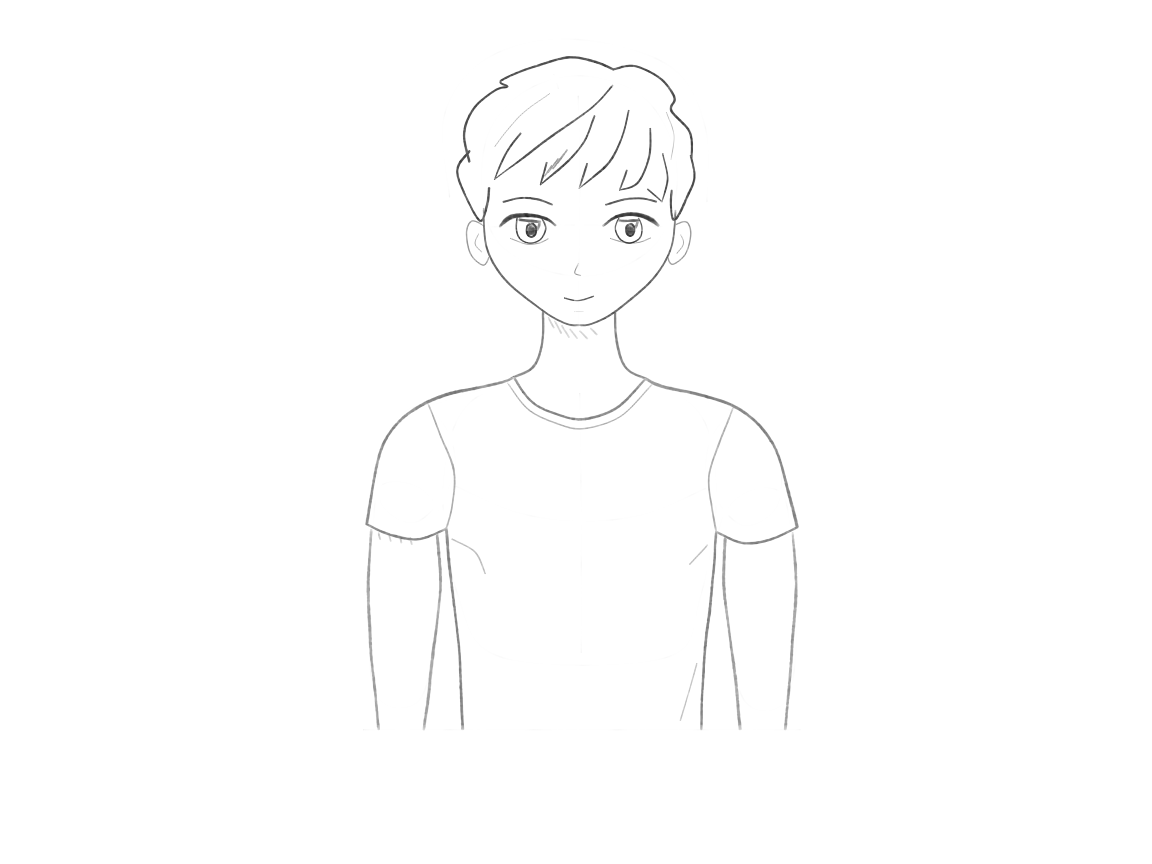
Enable JavaScript for the pencil replay. All drawing steps are available below.
What you’ll learn: Build a connected upper body, with a neck that supports the head and a shirt that fits around the chest and arms.
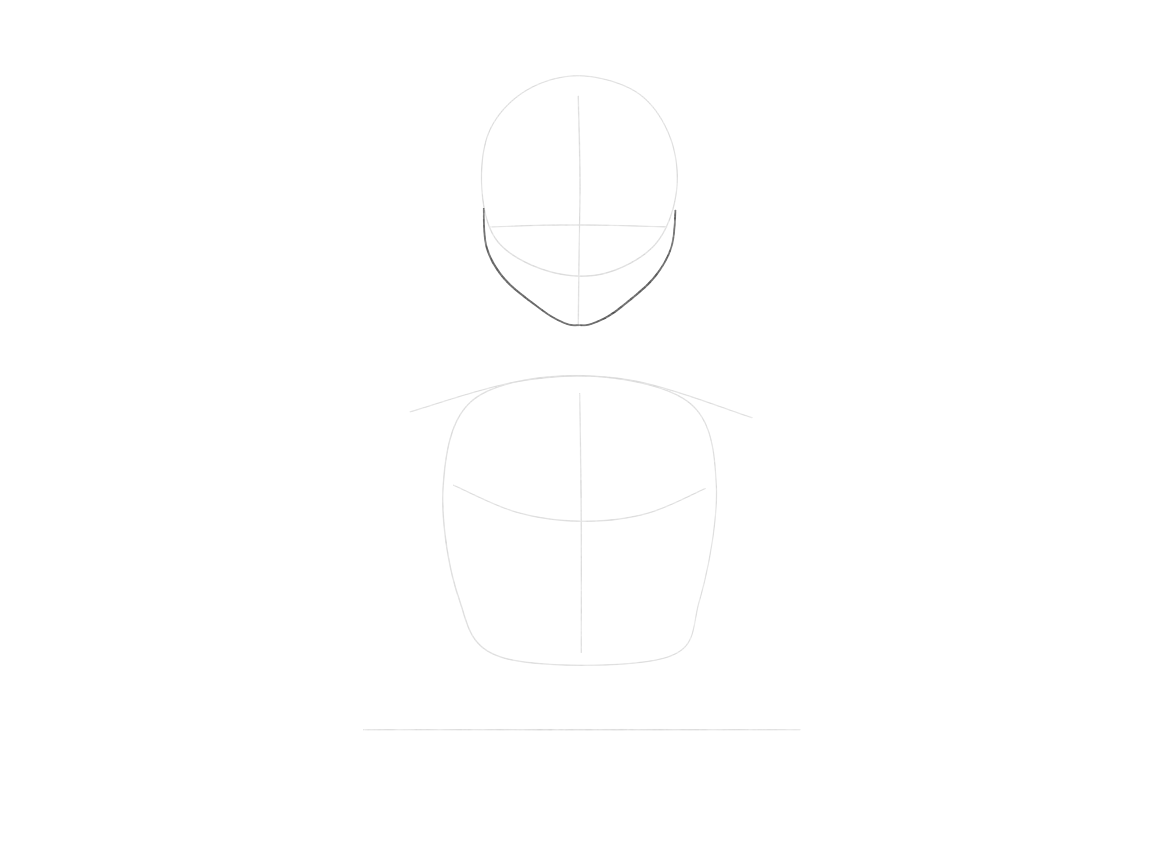
Plan the ribcage and portrait crop
Start with a light, rounded shape for the chest, then place the head above it. Leave a gap for the neck and room on either side for the shoulders and upper arms. Mark where the drawing will stop at the bottom.
Draw a center line down the chest and a gentle curve across it to suggest its rounded shape. These are body guides; they won’t be stripes on the finished shirt. Leave room beside the chest for the shoulders and sleeves. The hands will be below the part we’re drawing.
Why this works
Starting with the chest helps you make room for the whole upper body before you get caught up in drawing the face.
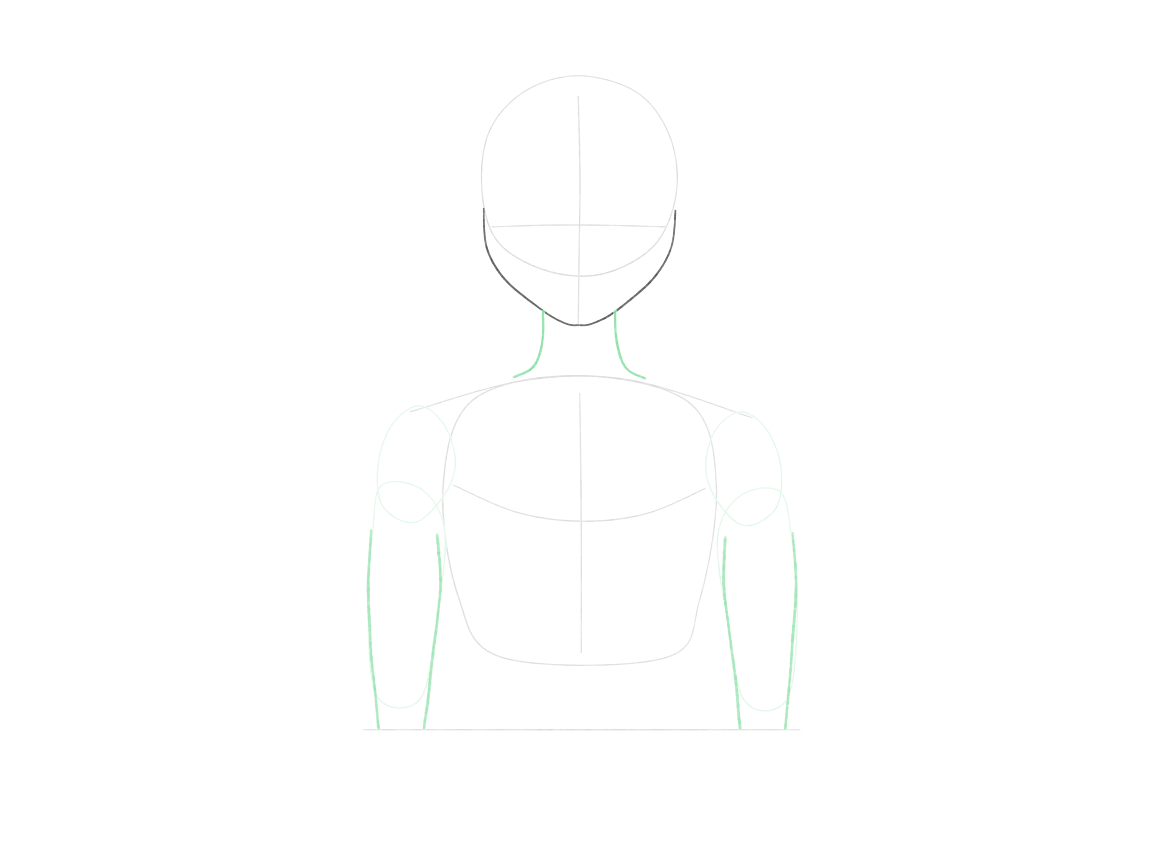
+ Green: add− Red: erase
Build the neck, shoulders and upper arms
Draw a short neck beneath the skull. From there, carry the shoulders out towards the sides of the chest, then turn each shoulder down into an upper arm.
Draw both sides of each arm so it has some width. The rounded top of the arm should join the chest at the shoulder, without looking like a separate ball wedged between them. Keep these lines light. You’ll use them to place the sleeves in the next step.
Why this works
It’s easier to fit a sleeve when you can already see the arm’s width and direction underneath it.
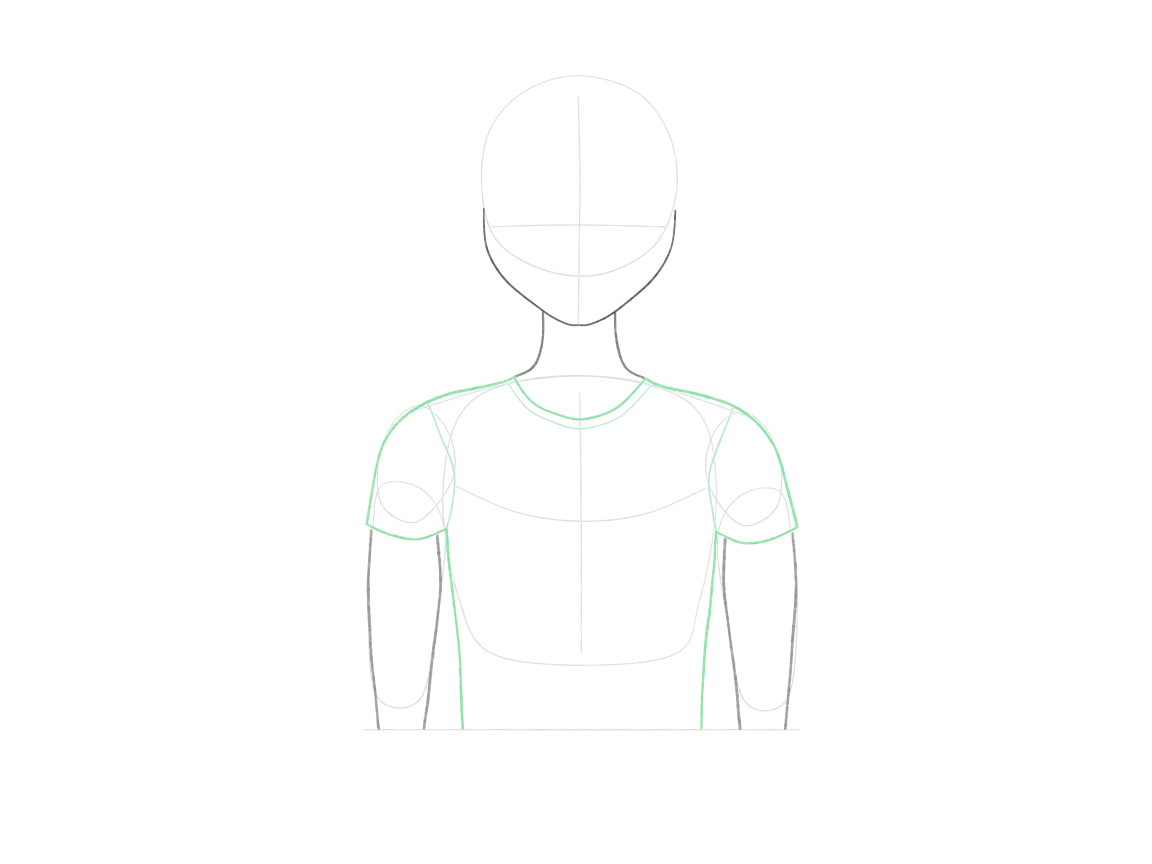
+ Green: add− Red: erase
Fit a shirt around the body
Draw a collar and fit the shirt around the chest. On each side, add the curved seam from the shoulder to the underarm, then a shallow curved opening around the arm below it.
There are two different edges here. The longer seam joins the sleeve to the shirt; the lower curve is the opening where the arm comes out. Use the arm guides to keep that opening wide enough. Connect the sleeve to the side of the shirt without pinching it into a sharp notch. Leave your body guides visible for now.
Why this works
The seam tells you where the sleeve joins the shirt. The opening shows how the fabric goes around the arm.
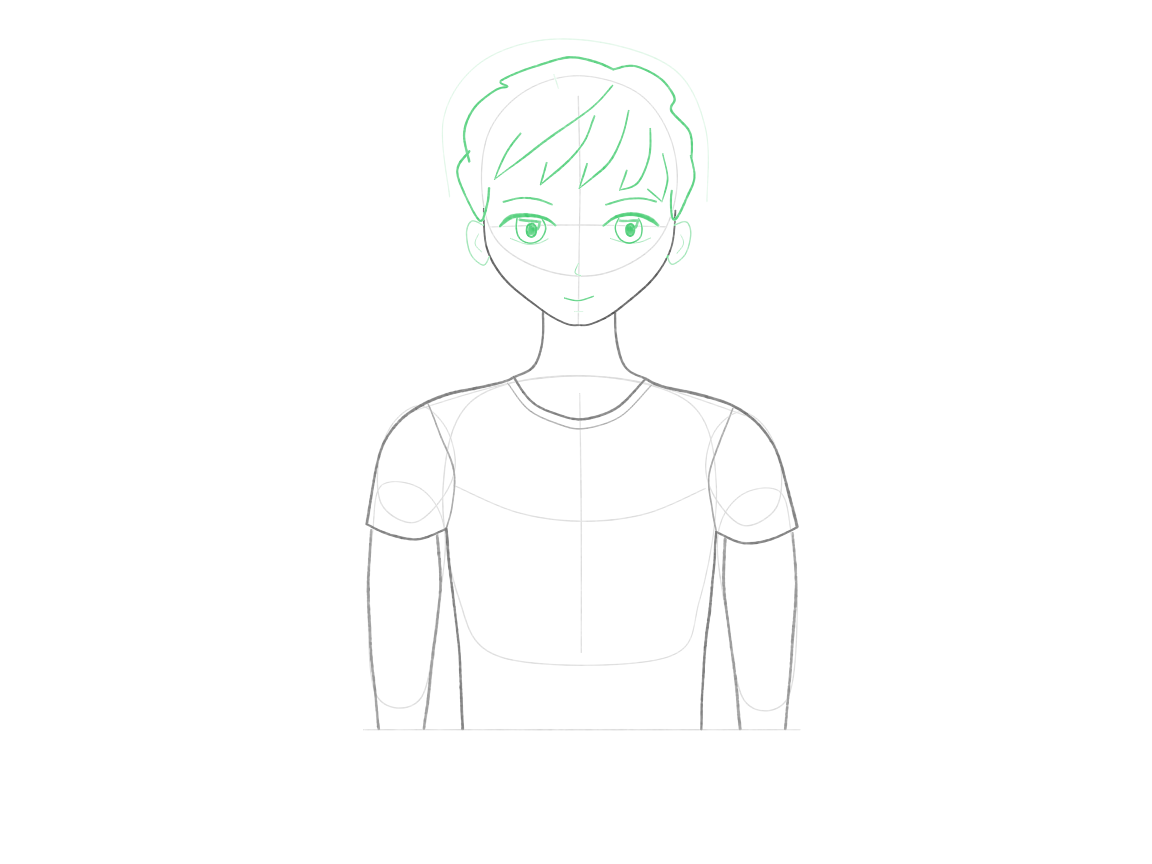
+ Green: add− Red: erase
Complete the familiar face and hair
Now give the character a face. Use the head guides to place two simple eyes, a small nose and a mouth. Build the familiar short hairstyle with a few broad locks that join into one hairstyle.
You’re drawing the face at a smaller scale here, so keep the features easy to tell apart. The body and shirt are already in place. Leave their shapes as they are while you add the expression and hair. You don’t need tiny eye highlights or lots of extra strands.
Why this works
You can use the head construction you’ve already learned to give this upper-body drawing a character of its own.
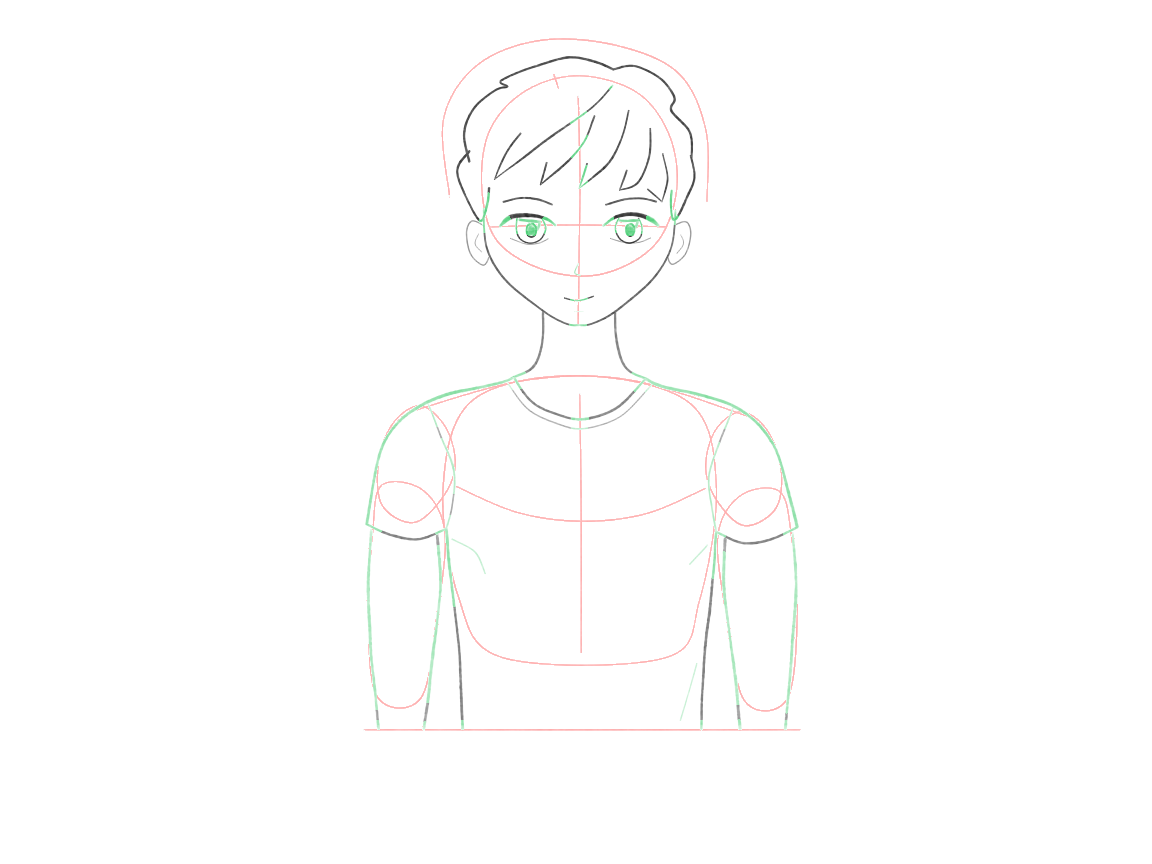
+ Green: add− Red: erase
Clear construction and explain the cloth
Add a few short folds near a sleeve or underarm where the cloth changes direction. Then erase the head and body guides you no longer need. Work in short passes and redraw any finished edge you accidentally erase.
Keep the collar, sleeve openings and exposed arms clear as you work. A short crease can show a turn in the fabric, but a hidden arm outline shouldn’t carry on through the shirt. Leave most of the chest area clear of extra lines.
Why this works
Removing the hidden guides helps you see the shirt over the body. You should still be able to follow the same arms and shirt edges after cleanup.
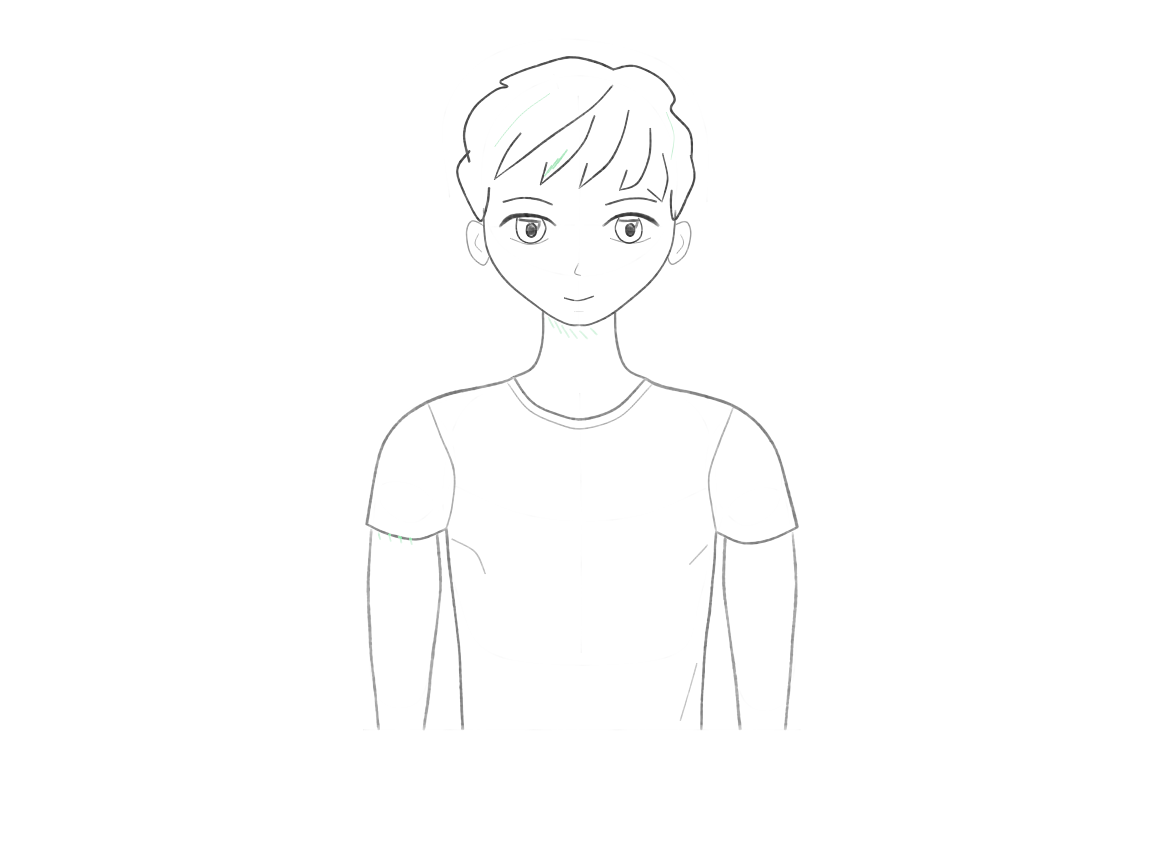
+ Green: add− Red: erase
Finish the connected upper body
Look over the whole upper body. Strengthen a few edges at the collar or sleeve openings where one form sits in front of another. Keep most of the shirt light.
Check that the neck supports the head, the shoulders lead into the arms, and both sleeves wrap around those arms. A little darker pencil can make an overlap clearer. If a connection is missing, fix its outline first.
Why this works
The neck, shoulders and arms need to make sense together even with very little shading. Dark accents help you see those connections.
A few useful checks
- Does an arm seem to start right beside the neck? Move its attachment out to the shoulder at the side of the chest before you draw the shirt.
- If a sleeve squeezes the arm to a point, widen the opening around the arm you already drew. The arm shouldn’t have to shrink to fit the sleeve.
- If erasing removes the short join between a sleeve and the side of the shirt, draw that join back in. Stop at the exposed arm rather than drawing across it.
Try a small change
For a little extra practice, sketch the same body with a different collar or longer sleeves. Keep the arms attached at the shoulders, and let each sleeve opening wrap around its arm. A rough sketch of the main shapes is enough.
You’ve given this character a connected upper body and fitted a shirt around it. Next time you draw a character, you can use the same chest and arm shapes to work out where the clothes belong.
Guided lesson
You’ve followed the steps. Now find out how it went.
In the Draw Anime Characters course you draw this one and 5 more on our canvas, with Luna checking each step: what’s off, how to fix it, before you move on. Pay once and the lessons stay in your account.
More from Draw Anime Characters