Free tutorial · Lesson 4 of 6
How to Draw an Anime Face in Three-Quarter View
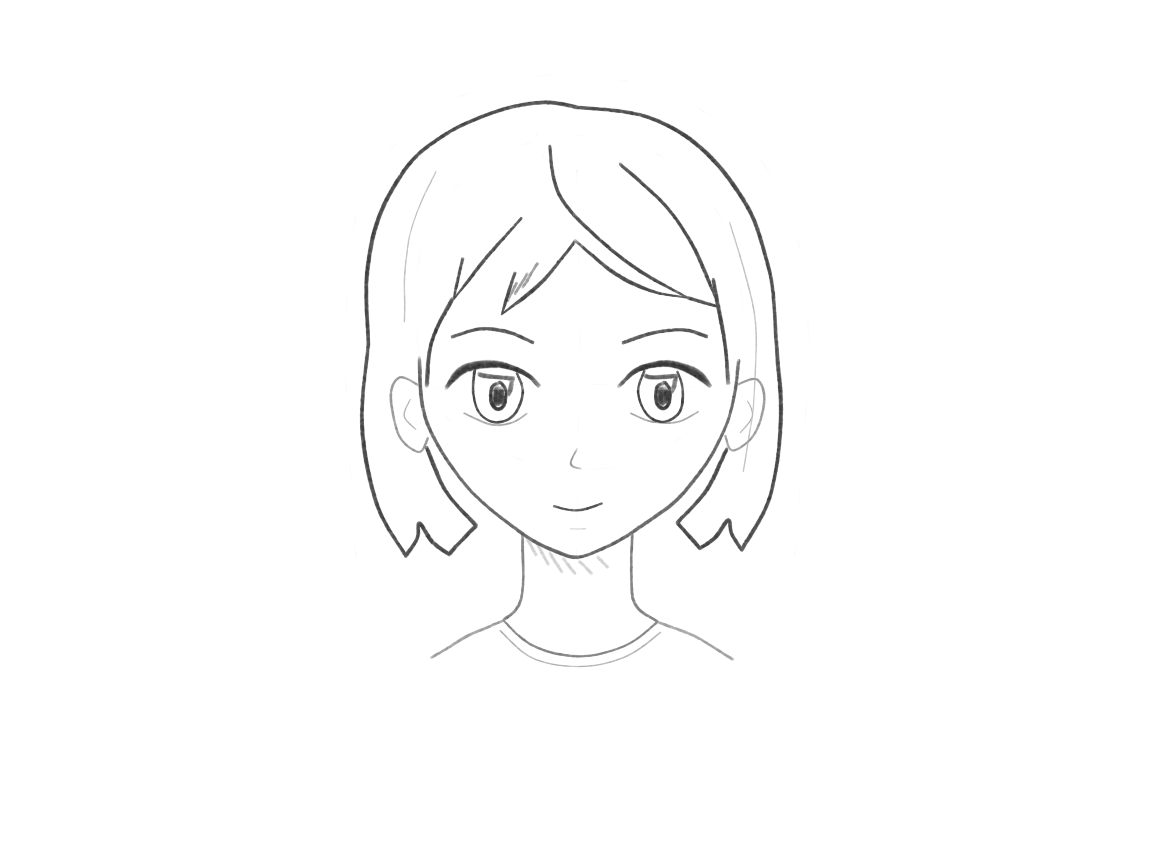
Turn a familiar anime head gently to the right. Keep the jaw, eye pair, nose, mouth and bob consistent with the same shallow view.
Skip to the stepsWatch the pencil strokes
Free replay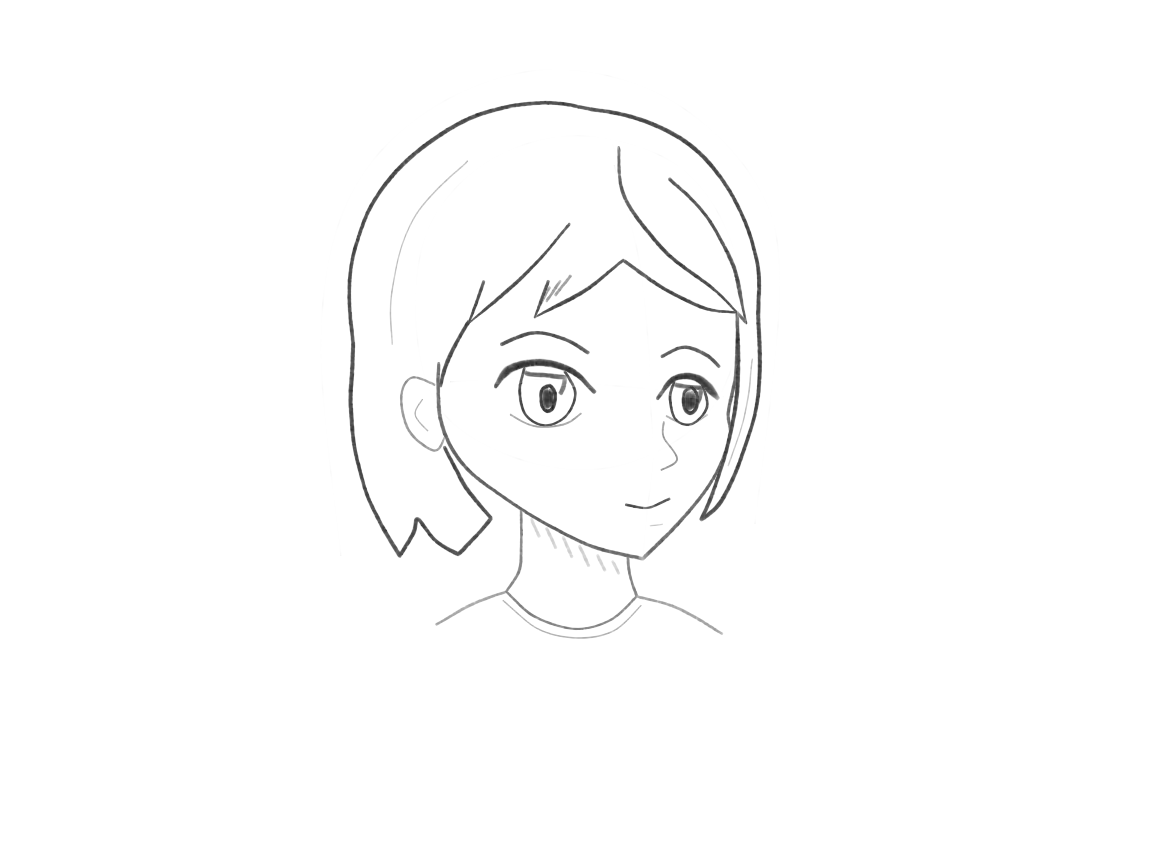
Enable JavaScript for the pencil replay. All drawing steps are available below.
What you’ll learn: Turn the whole head structure, not just slide features across an unchanged frontal face.
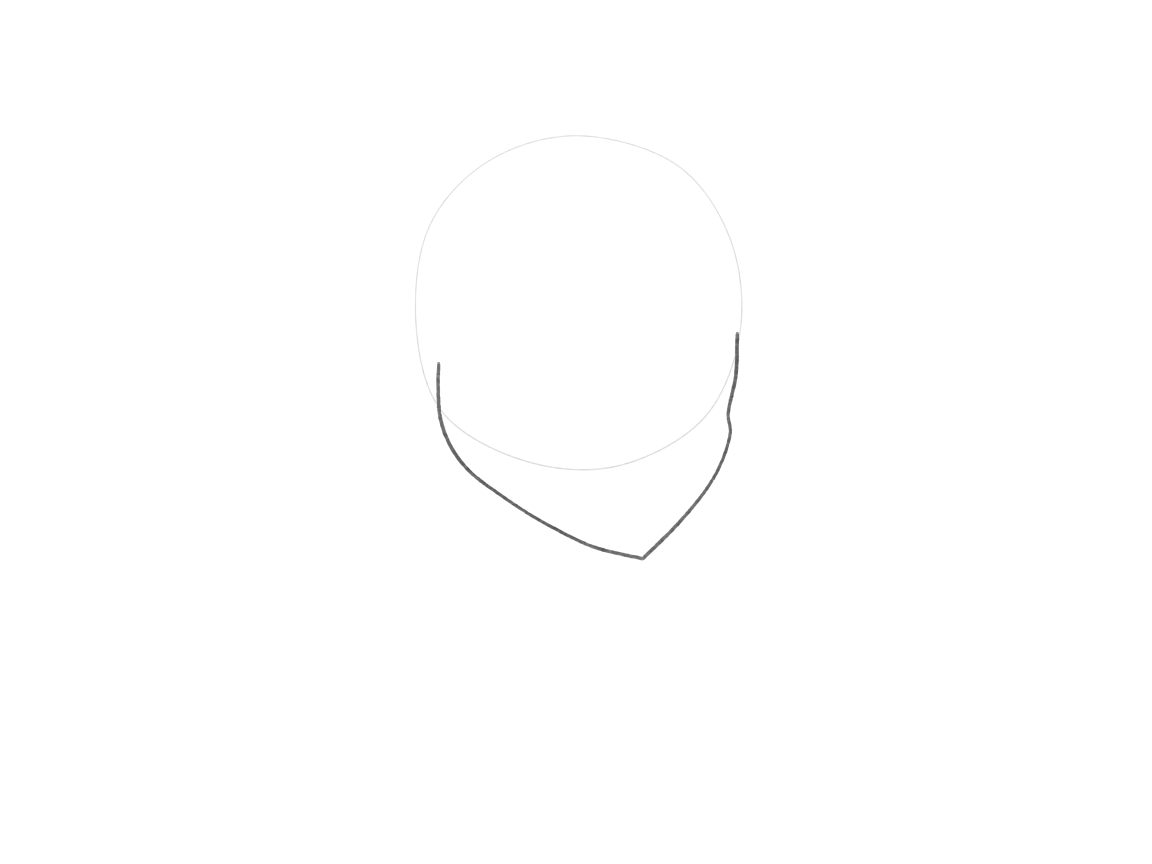
Plan a turned skull and jaw
Plan the skull, then place the chin a little toward the direction the face turns. Connect the cheeks to it. One side of the face will show more width than the other.
The example turns toward the right side of the drawing. Place the chin slightly right of the skull’s center. Connect a fuller cheek on the left and a narrower visible cheek on the right. Both sides still belong to one rounded head.
Why this works
A head turn changes the visible jaw and cheek widths as well as the nose position.
+ Green: add− Red: erase
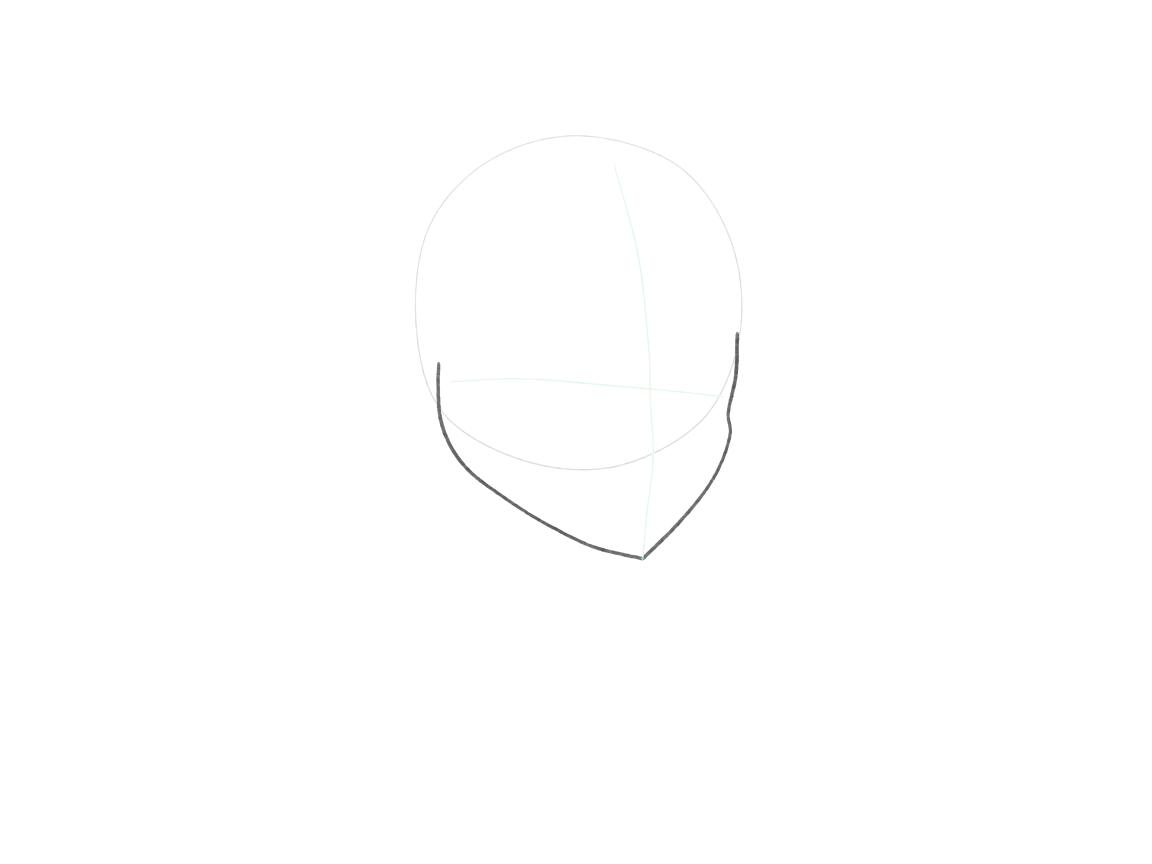
Wrap the face guides around the head
Curve the centerline around the head toward the chin. Add an eye guide that follows the same turn. These guides show where the face points, so keep them visible while placing the features.
Curve the face centerline toward the turned chin. Draw the eye guide across the front of the head, bending gently with that same turn. The left side of this drawing is the nearer, broader side; the right is the farther, narrower side.
Why this works
The guides describe one rounded head. Opposing guide directions would give later features conflicting instructions.
+ Green: add− Red: erase
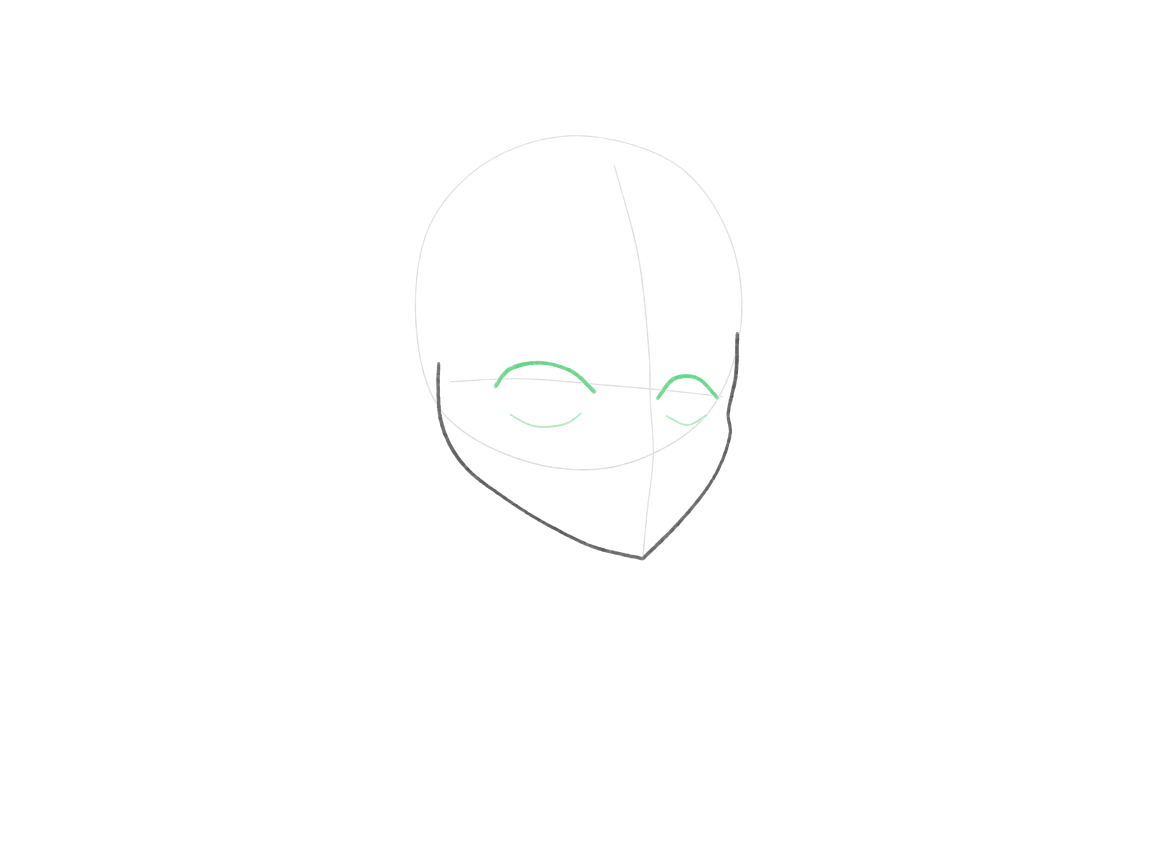
Place both eye envelopes in the turned face
Place both eye shapes along the guide. The far side has less visible room, so its eye shape may look narrower. Compare each eye with the head around it rather than making two identical symbols.
Draw both eye envelopes along the guide. Give the nearer eye room on the broader cheek and fit the farther eye into the narrower visible region. Do not make the far eye exactly half-size. Judge its room between the facial center and cheek.
Why this works
The far eye uses the space available on the far side. There is no universal half-width rule.
+ Green: add− Red: erase
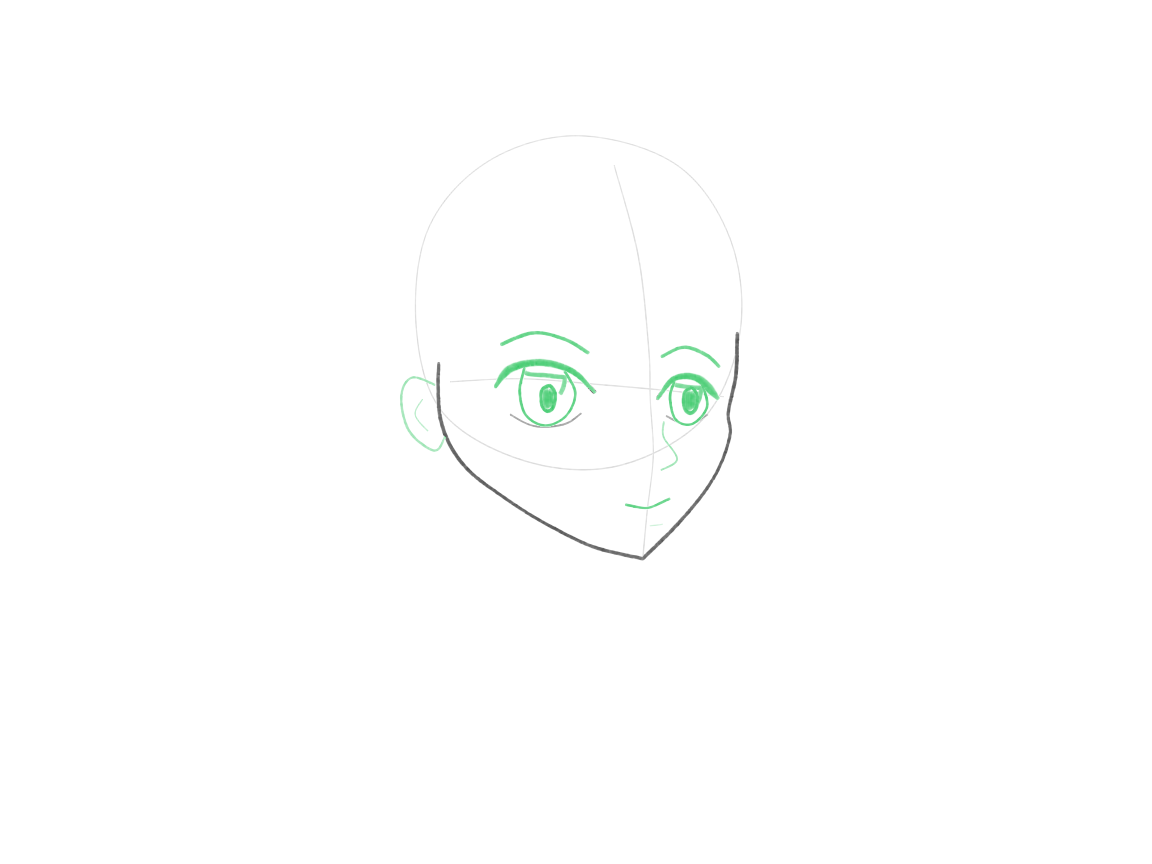
Add the gaze, nose, mouth, and visible ear
Build the simple eye details, then place the nose and mouth on the turning face. Keep the nose small. Each feature should agree with the guides rather than point in a different direction.
Add simple irises, pupils and brows to the pair. Place the nose and short mouth along the turning face center, rather than in the middle of the page. Add the visible ear on the nearer side. The jaw, guides and features should all point the same way.
Why this works
The small features belong to the turning face, not to the page’s center.
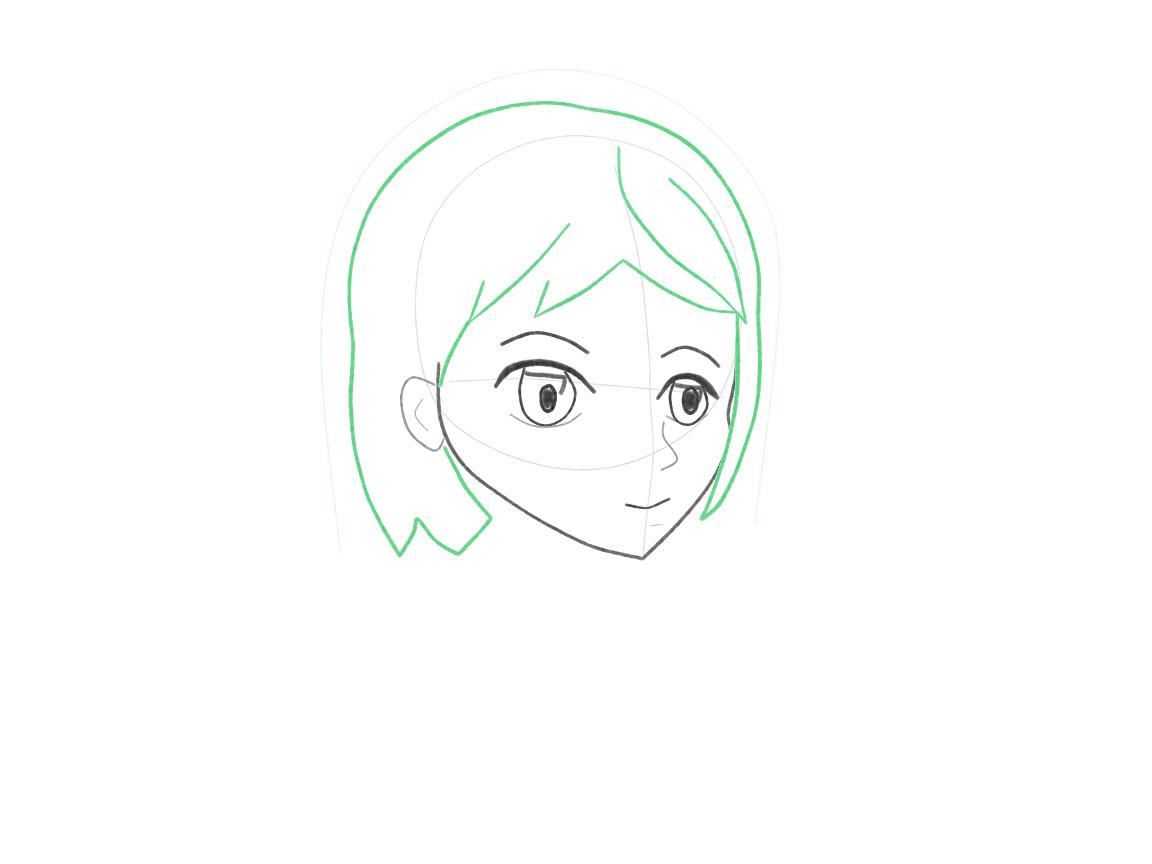
+ Green: add− Red: erase
Carry the familiar haircut around the turn
Build the familiar haircut around this turned skull. More of one side is visible, and some hair edges disappear behind the head. Keep the main part and lock shapes without forcing the old front view onto them.
Plan the bob outside the skull and adapt its broad sweep to this view. The near side shows more hair; the far side has less visible width. Draw connected locks and stop edges behind the nearer forms. Keep both eyes readable.
Why this works
The hairstyle wraps the same volume as the face. Visible side widths change with the view.
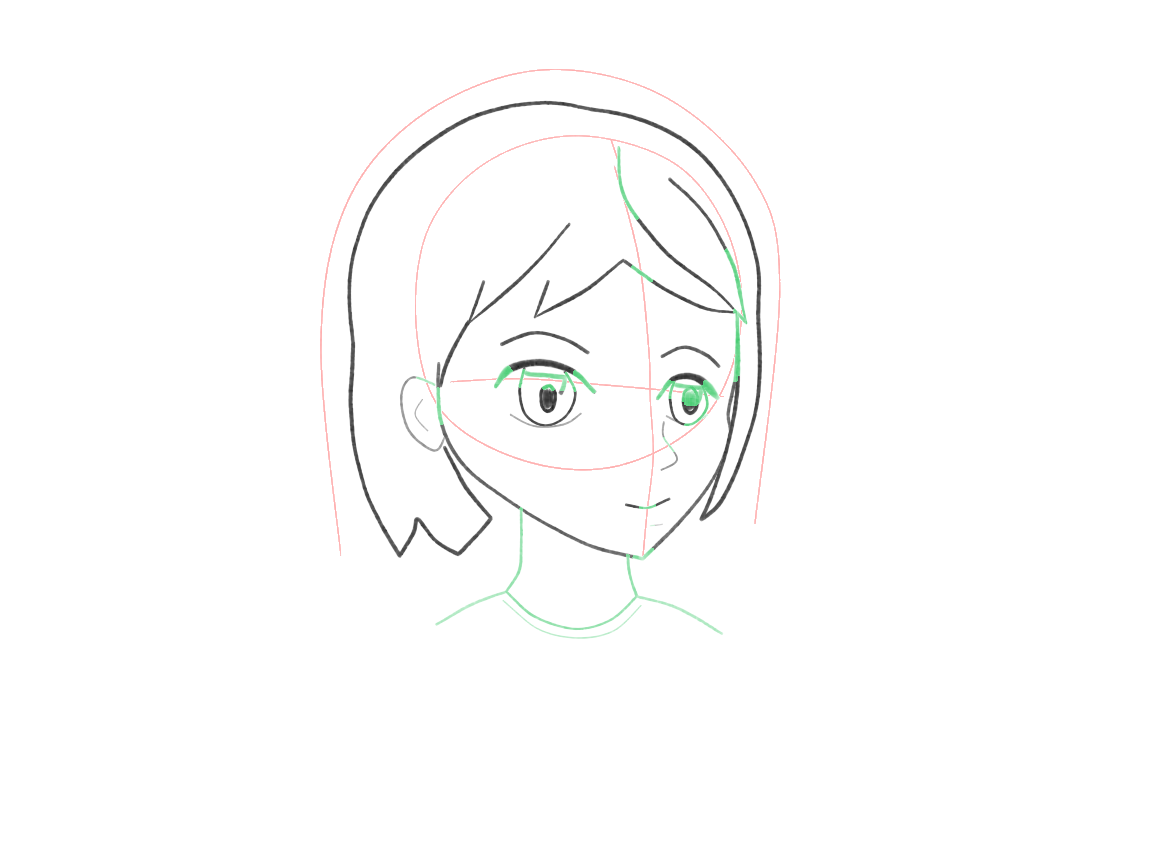
+ Green: add− Red: erase
Connect the neck and remove used guides
Draw a short neck beneath the skull, with both sides following the same gentle direction into the collar. Then remove the used guides while preserving the turned cheek and jaw.
Think of the neck as one short supporting column under the skull. Let the jaw overlap its top. Keep the two sides on a compatible path, then widen gently into the shoulders at the base; avoid a sideways elbow halfway down. Add the small collar. Remove used face and skull guides only after the features and hair are placed, repairing any short finished edge touched by the eraser.
Why this works
The neck supports the skull as one form. Its sides can curve and taper without making a sharp sideways bend.
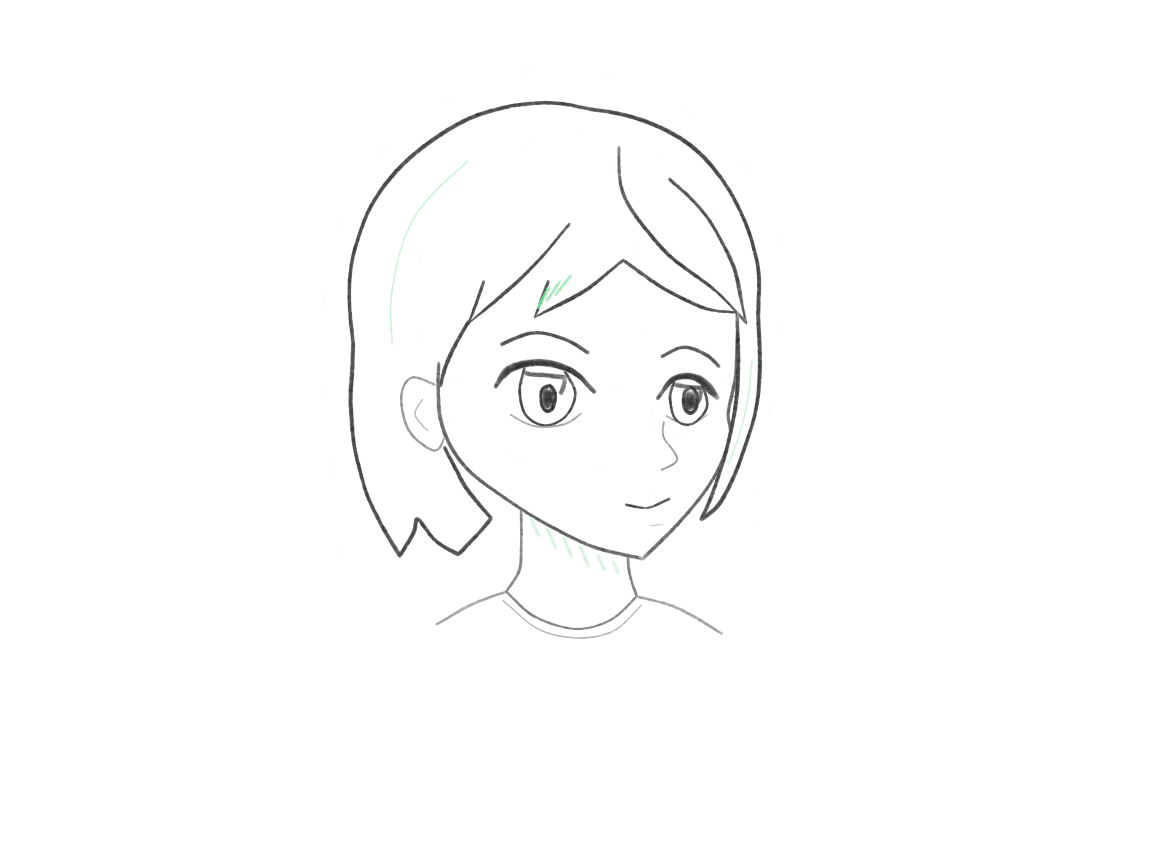
+ Green: add− Red: erase
Emphasize overlap without hiding geometry
Finish with a few darker overlaps and a small shadow beneath the hair or chin. The head should already read as turned without these accents. Leave the face mostly light.
Add a few darker overlaps under the fringe and a little shadow below the chin. Keep the far eye separate from the hair and cheek, and leave the short supporting neck readable. The turn and neck should already work in the outlines; shading cannot repair a sideways kink.
Why this works
Contour and feature placement establish perspective; a darker side alone does not turn a head.
A few useful checks
- If you see this problem: The chin points right, but both jaw sides still form the old front-view shape. Bring the far-side contour closer to the turning centerline.
- If you see this problem: The mouth is still centered on the page instead of on the turned lower face. Move it slightly toward the face's centerline.
- If you see this problem: A section of the far cheek disappeared during cleanup. Restore that short edge so the face still connects to the chin.
- If the neck makes a sharp sideways elbow before reaching the collar, bring that middle section back between its jaw and collar attachments. Keep a short supporting form with gentle widening only at the base.
Try a small change
Sketch only skull, jaw, centerline, and eye guide for a head turning the opposite way. No polished hair or eyes needed. This is a spatial transfer exercise, not a seventh view to master.
You have turned the whole head instead of moving features independently. Next, you will connect a head to a simple upper body and clothing.
Guided lesson
You’ve followed the steps. Now find out how it went.
In the Draw Anime Characters course you draw this one and 5 more on our canvas, with Luna checking each step: what’s off, how to fix it, before you move on. Pay once and the lessons stay in your account.