Free tutorial · Lesson 5 of 6
How to Draw a Cute Axolotl — Easy Step by Step
Draw a swimming axolotl with a broad smiling head, six softly frilled gill shapes, four small limbs, and a curved tail fin. Make a connected pose and use the same shapes again and again but with slight variations.
Skip to the stepsWatch the pencil strokes
Free replay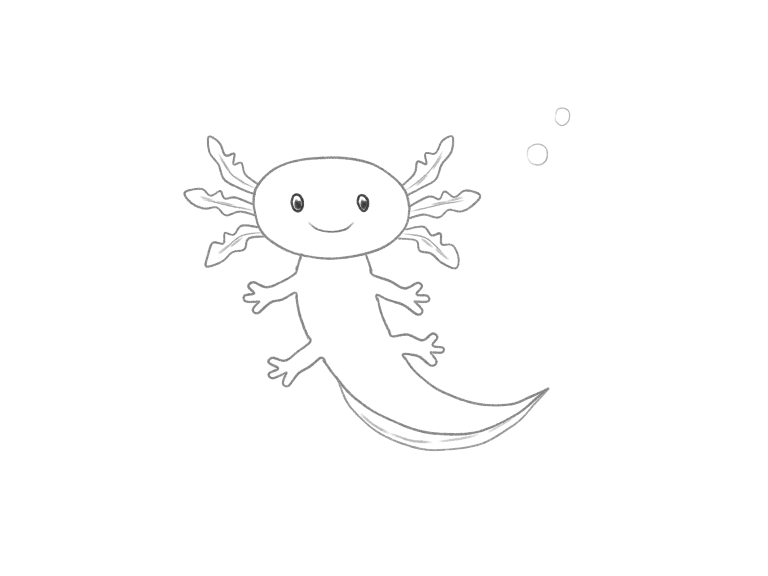
Enable JavaScript for the pencil replay. All drawing steps are available below.
What you’ll learn: Build a connected curved pose. Give repeated gill branches some width between their two edges, and keep the attachment point for each limb distinct from the gill root on the head.
+ Green: add− Red: erase
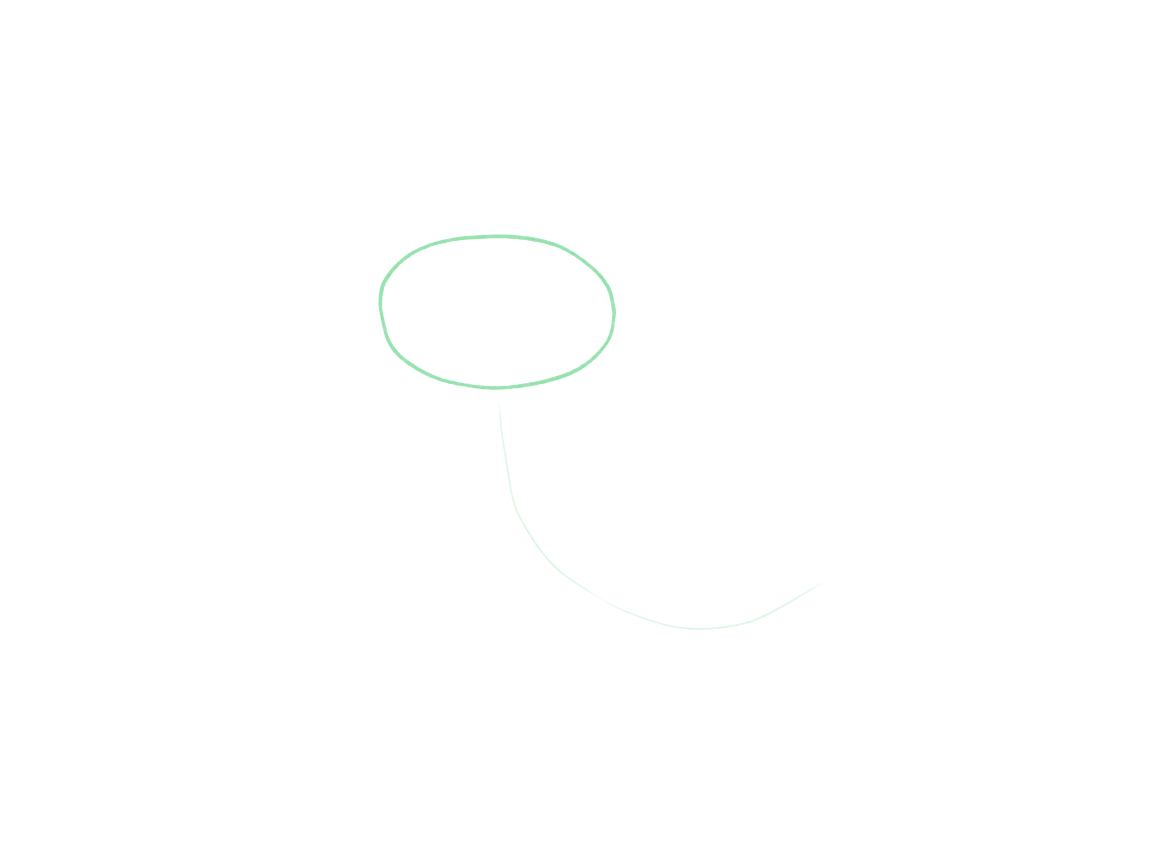
Plan the head and swimming direction
Start with a big rounded head. Leave a lot of space on the left and right sides of the head for the gills. Start a light line in the middle of the bottom edge of the head, follow this down through the future torso of the axolotl, and then curve gradually to the right for its tail.
Start with a big, rounded head in the upper half of the page, with comfortable margins. Leave lots of space to the left and right of the head for the gill roots. From the middle of the head's lower edge, draw a light direction guide down through the future torso. Gradually bend the line to the right and continue it toward the tail tip, keeping space below and beside the curve.
Why this works
The major direction of the axolotl is indicated by this simple view of it from above: the head is at one end, the body continues fairly straight below the head, and the limbs will extend to the sides. The light guide begins at the middle of the head's lower edge, runs through the future torso and then curves right for the flexible tail. It plans the direction, not the outer edge. Most of the turn takes place in the tail.
+ Green: add− Red: erase
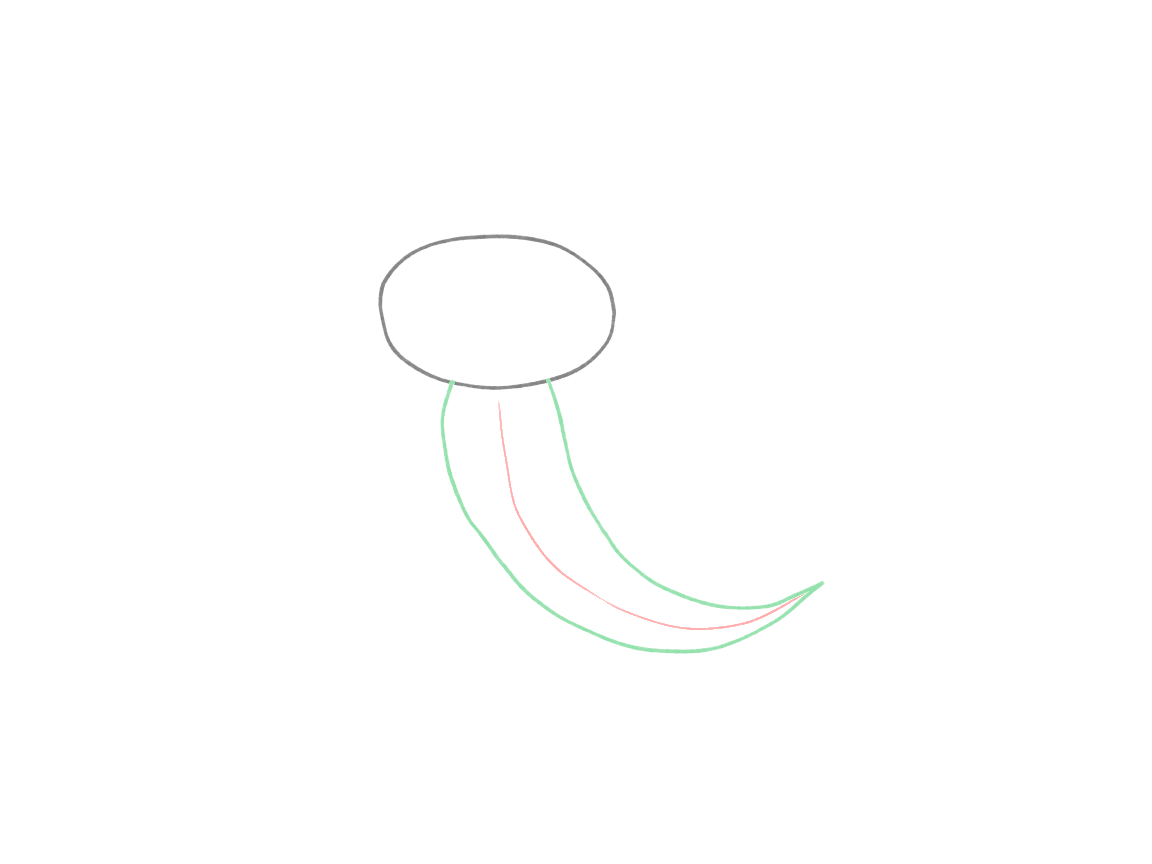
Build the body and tail around the curve
Join a slender torso under the broad head and continue its two sides into one gently curving, tapering tail.
Erase the guide line with a pass in each direction. Begin the outer edges of the body at two evenly spaced points along the lower contour of the head. A long rounded body follows the head, noticeably narrower than it. Continue the left side of the body down and around the outside of the long tail sweep. Continue the right side down and along the short inside route of the tail. The two sides of the body meet at a pointed end that is directed to the right. The body consists of several comfortable curves and tapers slowly to a point at the end of the tail.
Why this works
On the inside the line follows the same bend as the outside, but is shorter. The whole torso has roughly the same width before it starts to taper off towards the tail end. The region of the body including the torso is a single stable mass, and the flexible tail forms a clear contrast to this. A short head contour can remain across the attachment, showing the head in front of the body.
+ Green: add− Red: erase
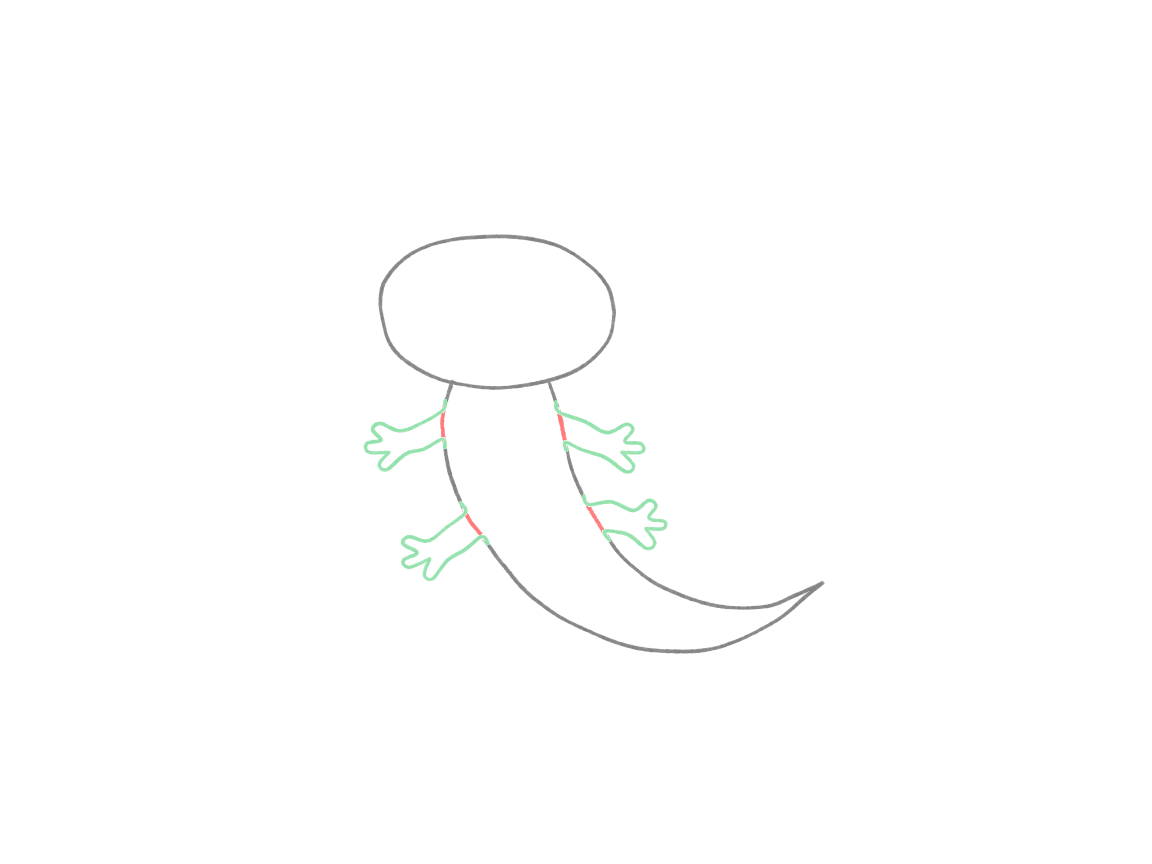
Attach the short limbs
Add 4 short limbs – 2 pairs of limbs – at separate places along the torso with one pair near the head and the other pair near the end of the body.
Add front and back limbs in pairs of two short ones. For each limb, erase a short segment of the body edge to create an opening. Draw outward from one end of the body opening, bend the end down to form a small splayed foot and then draw back along the other side of the limb to the other end of that same opening. Leave a clear gap between the front and back pairs of limbs.
Why this works
If you look at the body from above, the two pairs of limbs will be pointing to the left and right of the body. If you like, each pair of limbs can start off at roughly the same height and then bend slightly. Each limb can point in a slightly different direction at the end. Each limb in the front and back pairs will attach to the body through its own opening in the edge of the body. Place the back pair on the torso, before the point where the existing tail narrows. Do not add a foot on the tail.
+ Green: add− Red: erase
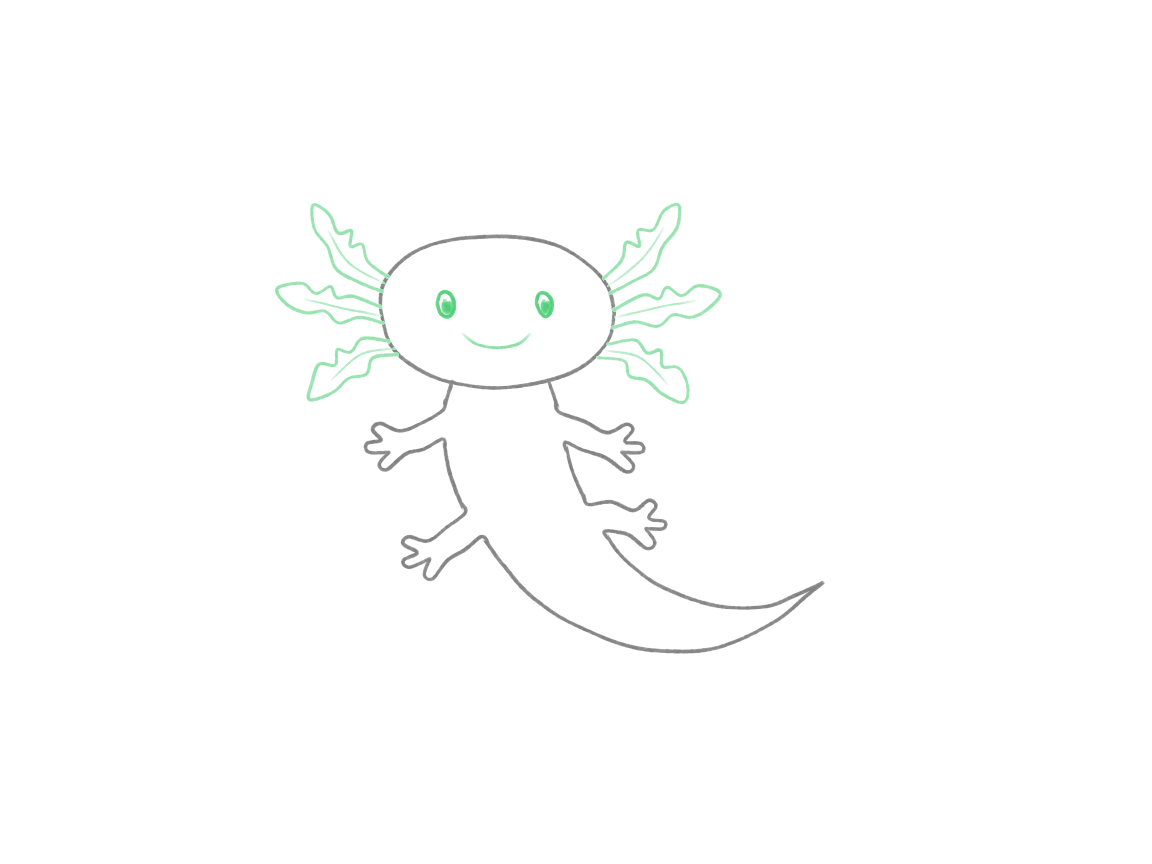
Add the gills and face
Add small eyes and short smile inside head and fan out three broad gill branches with softly frilled edges on each side of head.
For the gill fans, start with the upper branch of the left side of the head, go out and then up in width, round the tip and then bring the second edge to the head by going out and then back in width in a soft edge notch. Draw a short central line down the branch if it helps define it. The upper branches go up, the middle ones go out and the lower ones go down. Continue in this fashion with the remaining two branches of the left side of the head and then repeat for the right side of the head. Place the eyes in the head at about the same level and draw a short smile between and below the eyes.
Why this works
Using the same fan arrangement on both sides of the head supports our view of the creature from above. As the individual gill branches are drawn they can vary in length and width. Two edges to a branch means that each branch has area to it so does not resemble a whisker, instead it looks like a gill. The eyes and the mouth of the creature can be drawn inside the head of the creature and will form part of the creatures expression which will be seen to be framed by the gills.
Finish the flowing silhouette
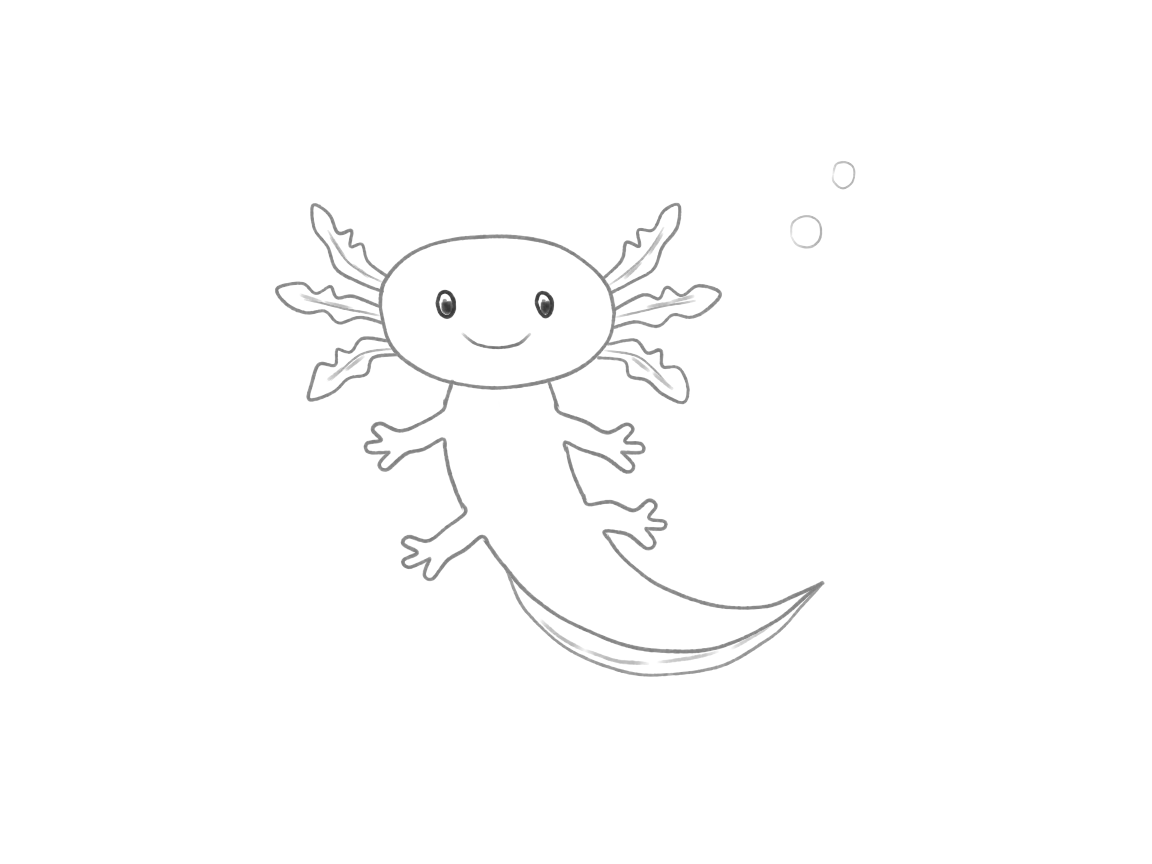
Follow the body into the tail and add a narrow fin edge beside the outer tail curve, beginning beyond the back limbs and joining the existing tail tip. Use gentle arcs and a few light accents, keeping the pose clear.
Draw the outer edge of the tail as a thin fin, starting behind the back limbs and joining the existing tail tip. Break up long arcs to make the drawing easier to manage. Add minimal detail such as extra lines to the gills and fin, keeping most of the form white. Two small bubbles are optional in the open space at the upper right. Stop when the silhouette, limb pairs and face are clear.
Why this works
The fin will follow the shape of the tail, and reach to the same point and bend to the same point as the tail’s end. It should look like a continuation of the tail, and be just as simple as the tail’s end. A few sparse accent lines will suffice to keep the fin separate from the rest of the body. The fin and tail will be a single unshaded mass, a complete drawing even if it has no texture.
A few useful checks
- Add two edges to each of the gill branches and some width to the gill branch so that it has some substance around the center line of the gill. A bare fork is a whisker not a feathery gill.
- Keep the roots of the gills at the head and the four limbs attaching to the torso. Leave a little space between the gill branches so they are still distinguishable from one another.
- The width of the torso should be generally even. The main turn in the pose should occur in the tail, and if you find that any edge of the body creates a sharp corner or an unexpected bump, rework that small section before adding the tail fin.
Try a small change
Optional: draw a second view of the swimmer with the tail going the opposite way. This does not have to include a face or all of the gills at the head. In fact simply drawing the head, body and tail would be sufficient.
Rather, your movement curve became one connected swimmer! Simple broad gill shapes, separated limbs and a light tail fin are sufficient to give the character adequate individuality without having to add a host of very small details.
Guided lesson
You’ve followed the steps. Now find out how it went.
In the Draw Cute Animals course you draw this one and 5 more on our canvas, with Luna checking each step: what’s off, how to fix it, before you move on. Pay once and the lessons stay in your account.