Free tutorial · Lesson 1 of 6
How to Draw a Cute Sleeping Cat — Easy Step by Step
Practice: Draw a curled up sleeping cat made of a broad body and a small head. Work out which features sit in front of the others and where their lines should stop. Draw a small face, one paw and a curl of tail.
Skip to the stepsWatch the pencil strokes
Free replay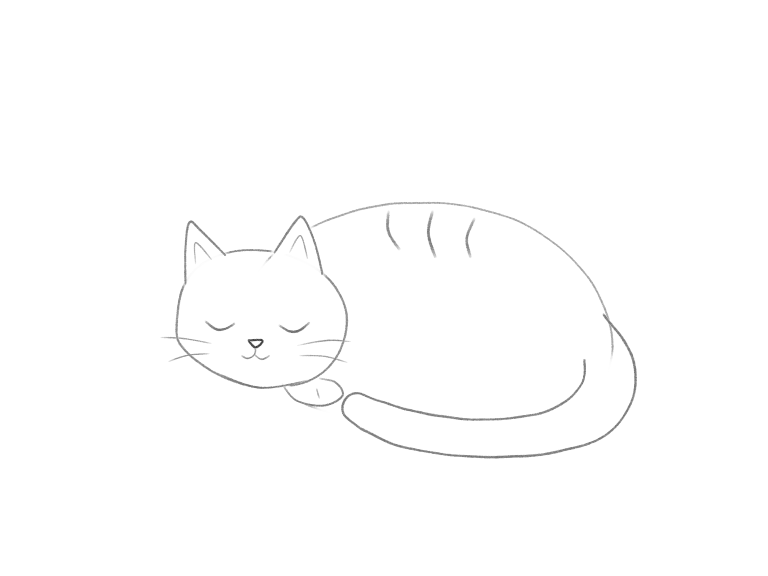
Enable JavaScript for the pencil replay. All drawing steps are available below.
What you’ll learn: Draw a curled sleeping cat made up of a few large shapes and use stopped or erased lines to depict overlap.
+ Green: add− Red: erase
Place the body and head
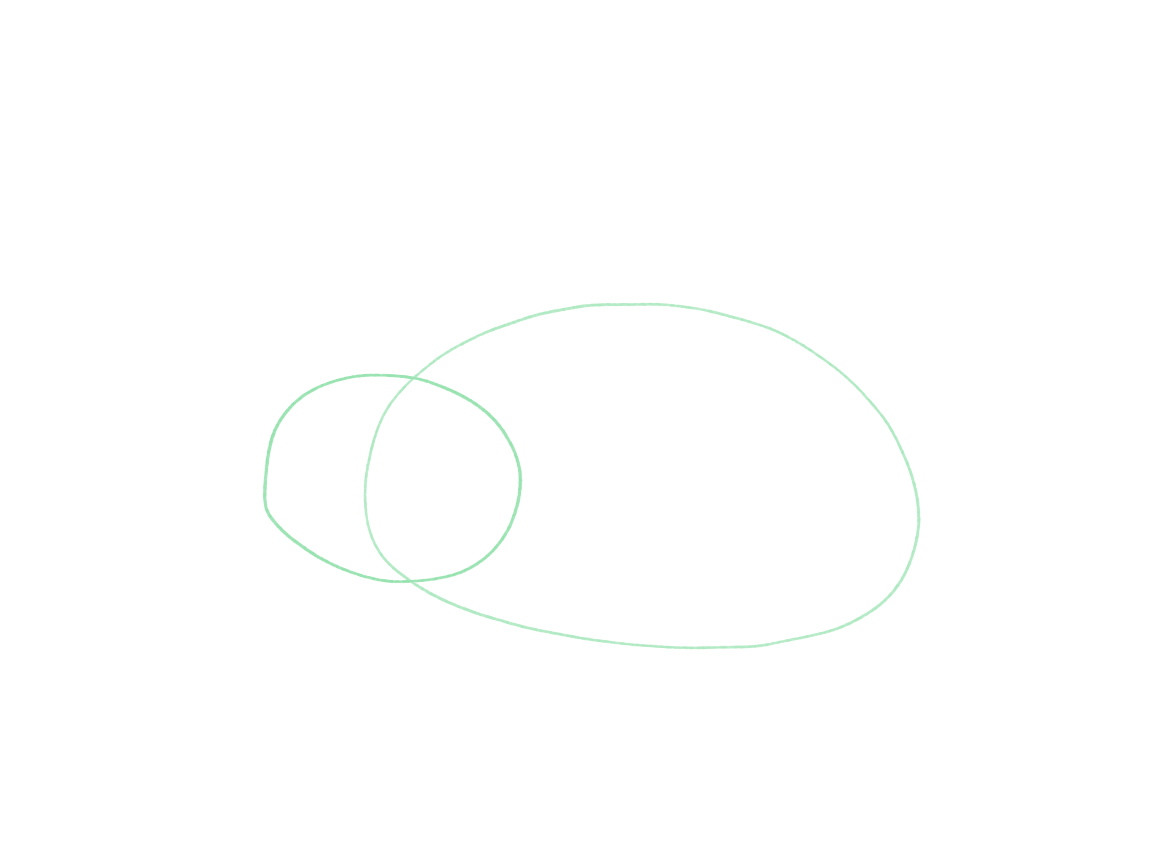
Start with a big rounded body form in the middle of the page. Add a small head form at the front left of the body form, with space above the head for the ears and below the head for the tail.
Use light pressure to create two strokes for the body curves in a couple of comfortable movements. Then draw a rounded head for the front of the cat and place it on the left side of the body – perhaps with a bit of space above it for the ears and below it for the tail. Let the head touch or overlap the body. The demonstration leaves a body line crossing the head here; we erase that hidden section in the next step. Planning the two sizes now keeps the whole cat on the page. The ovals do not have to be perfectly rounded.
Why this works
First, lay down the large masses of the cat, then add the details. Before beginning the face, study where it will fall in relation to the body and head as a whole. A curled up cat has a small head in relation to a broad body. A round body is another option for a curled up cat. Check both size and contact: the head should be visibly smaller and rest against the body. Contact alone does not fix a head that overwhelms the body. Drawing the first line very lightly will allow for correction of the overlap in the next step.
+ Green: add− Red: erase
Shape the head and ears
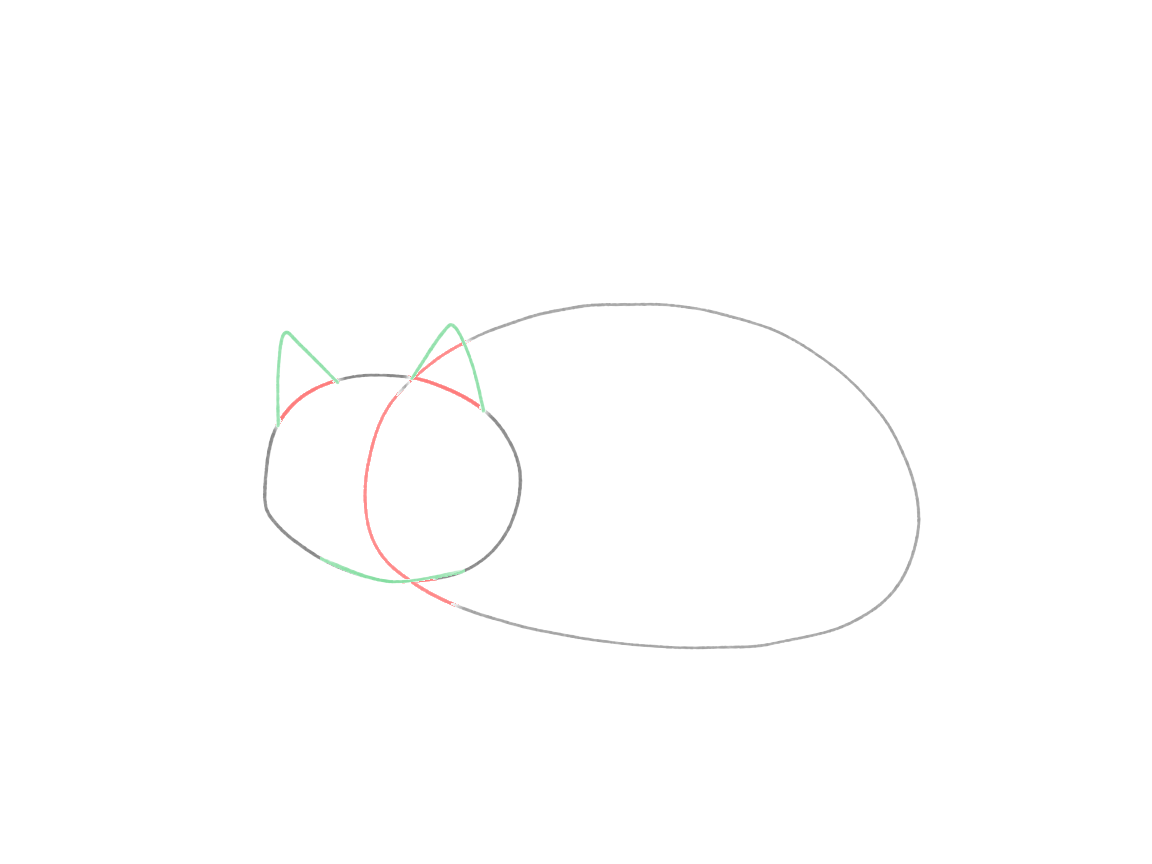
Draw two small softly pointed ears on the head. Draw the body line to come to an end behind the head and the ears to form a foreground shape.
First, erase the part of the body’s arc in the head (including the part behind the ears). Open a small gap in the crown of the head at each ear base. Draw a small rise followed by a return from one end of each gap to the other, joining the ear to the head. You can leave the tip of the ear soft. If you have to erase part of a cheek to get to the body underneath, draw that small section back in.
Why this works
The ears can be a little different in size or shape; they do not have to be matching triangles. The form of the head with the two ears in the crown of the head is in the foreground of this simple drawing. The body line stops at the head and the two ears. That tells us that the form of the head and the two ears is in the foreground.
+ Green: add− Red: erase
Add the curled tail and paw
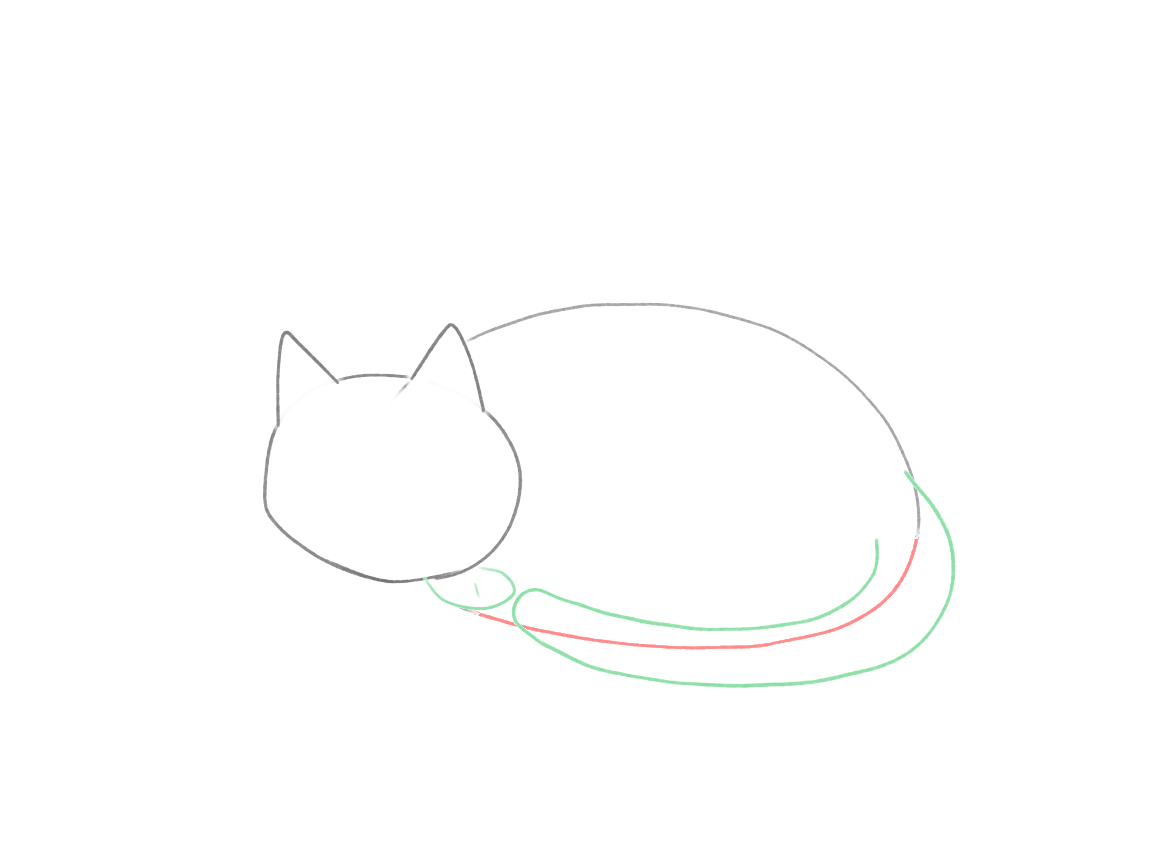
Draw a wide tail around the front of the body for the back end. A simple front paw should be visible near the head. Draw the meeting lines very simply.
Erase the lower edge of the body where the tail is going to cover it. From behind the body draw the outer edge of the tail as two strokes following around the foreground. The end of the tail can be rounded off near the head then return along the tail's inside edge toward the back of the creature. Leave the upper attachment partly hidden. Add one small rounded paw below the cheek, beside the tail tip. A short crease will suggest the paw to the viewer.
Why this works
A tail origin may be invisible but it must make sense. In this case the tail turns from the back of the body and comes round the front. Where it overlaps the body it fills in the edge. The single front paw should be clear of the tail. If several lines meet in a tight knot remove the unnecessary line(s) before adding more detail.
+ Green: add− Red: erase
Draw the sleeping face
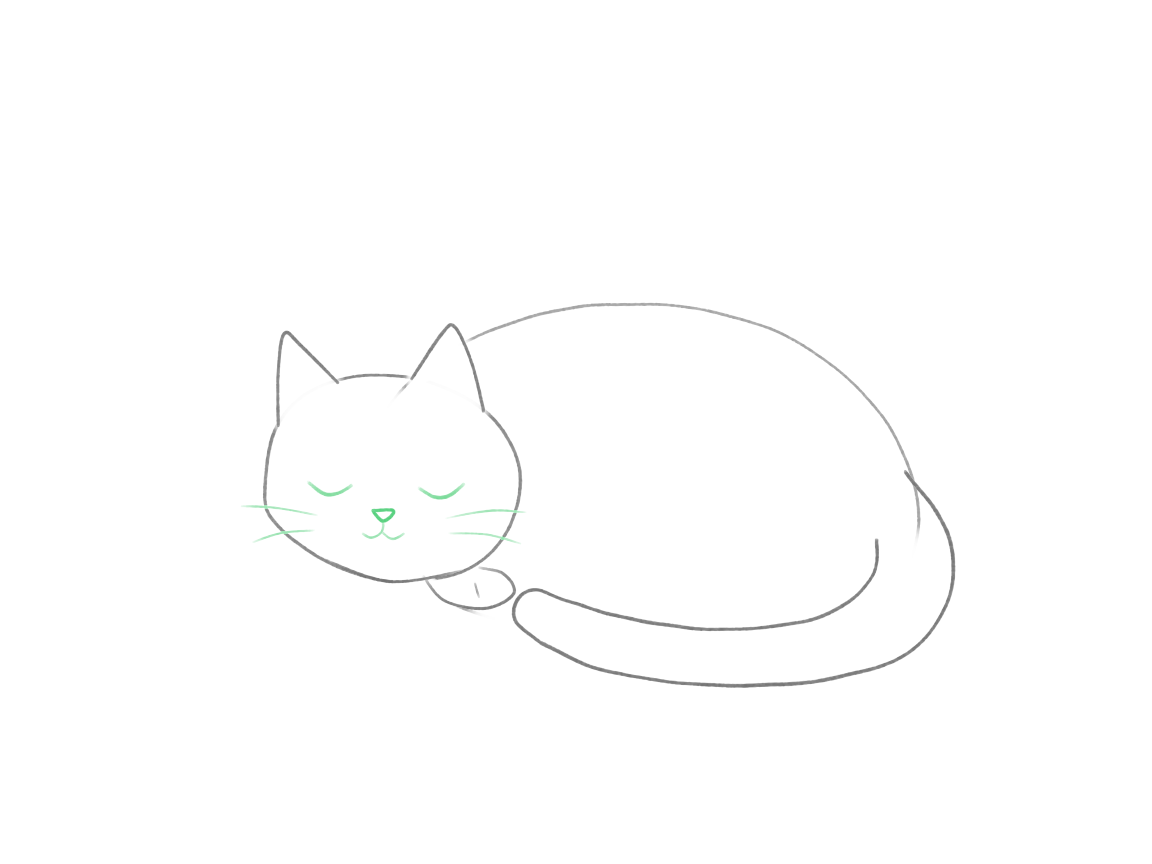
Create closed eyes within the head, a small nose below and between the eyes and a simple mouth below the nose. Only add a few whiskers near the cheeks of the head and draw them outward with light pressure.
The face is a small collection of related marks – the eyes are above the nose, the nose is between the eyes, and the mouth is below the nose. The nose connects to the mouth with a short line. Place the eyes across the middle of the head as two short closed-eye curves bending gently downward. Below the nose, use two small curves for the mouth. The whiskers emanate from the cheek and run outward from the face. The whole face fits inside the head and there is space between the face and the edge of the head.
Why this works
The features of a face are grouped together. The eyes are above the nose, the nose is between the two eyes and the mouth is below the nose. Even a small change in the position of the features or a variation in the eye curves can create quite a different impression. The closed eyes are very expressive of sleep, so no more is needed to suggest it. Leave a clear space between the features of the face and the cheeks and ears.
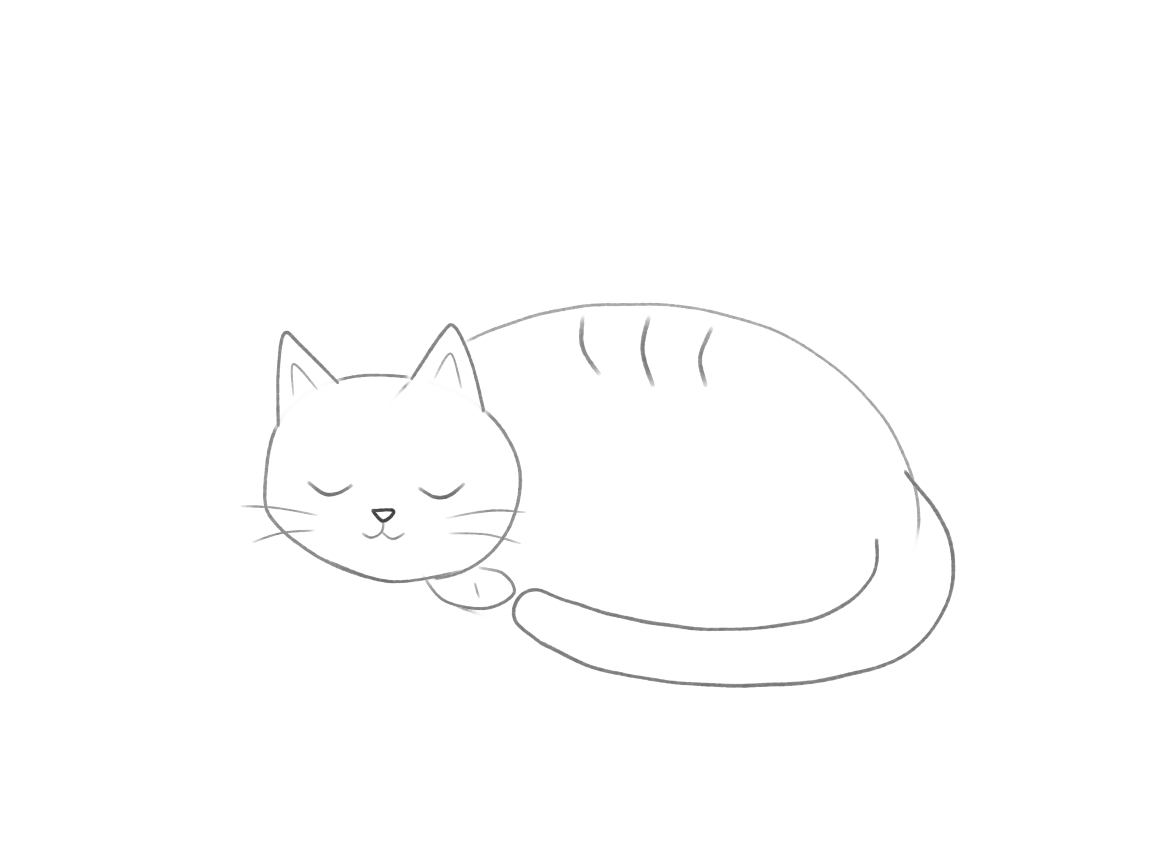
Finish without overworking
Now go back to your drawing and check for any cross-over lines. You can add a few simple body marks to your drawing if you like. But mostly leave the coat blank and finish your drawing as it is.
Follow the contours of the head, paw and tail with your eyes. If any line from the background cuts across a form in the foreground, erase that part of the line. Add one light line in the inner ear and some short stripes on the upper body of the cat. Cease marking before your additional marks become too distracting from the simple face of the sleeping cat. The demonstration does not include a grounding shadow for the cat. Your version may also be very light and simple.
Why this works
Finishing off means making decisions rather than filling up space. The coat can be suggested by a few markings rather than actually drawing fur. The clear head and wrapping tail of the body form the basis of the drawing and if they read then further shading is optional. Also leave some of the paper untouched in order to be able to see the small facial features.
A few useful checks
- If the head is as large as or larger than the body, reduce the head or enlarge the body, keeping them touching. The body should be the main mass of the curled form and the head a smaller feature on the front of the body.
- Do the head sit on the body or does it sit off to the side? Try to put it a bit closer to the body until it touches.
- The tail should be below the head’s location. The curled body should be wrapped in the curve of the tail, which should not cross the cat’s face.
- Remove the body edge where the head or an ear hides it. Restore the corresponding foreground edge if the eraser touches it.
Try a small change
Optional: draw a smaller sleeping cat with a rounder body. Keep the head touching the body and the tail below it. Try the main forms without retracing all lines of the larger cat.
Your sleeping cat was created using two main shapes, the connected features and lines that show which form is in front. The proportions can vary while the head stays smaller than the body and the parts connect clearly.
Guided lesson
You’ve followed the steps. Now find out how it went.
Draw it on our canvas and Luna checks each step: what’s off, how to fix it, before you move on. Your drawings stay saved, so you can see them get better.
More from Draw Cute Animals