Free tutorial · Lesson 4 of 6
How to Draw a Cute Frog on a Lily Pad — Easy Tutorial
Draw a cheerfull low sitting frog with folded back legs and small splayed feet. He sits on a notched lily pad beneath him, with its edge behind his feet. Try to explain the fold of each back leg by using simple contours. The background lines should be hidden under the animal.
Skip to the stepsWatch the pencil strokes
Free replay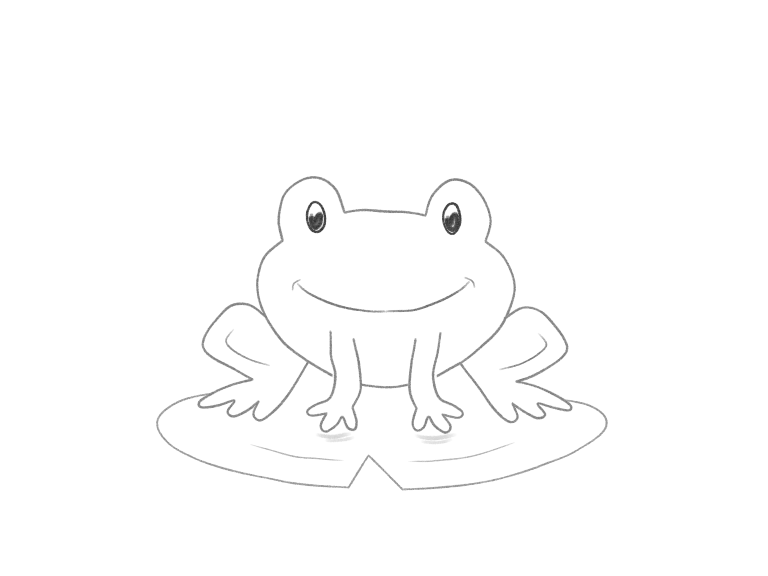
Enable JavaScript for the pencil replay. All drawing steps are available below.
What you’ll learn: Draw a broad frog body with folded hind legs on its sides. Keep the front and back forms clear where their outlines meet. Draw the frog’s feet on the lily pad.

+ Green: add− Red: erase
Establish the frog’s broad shape
Draw a low rounded body mass with two raised eye bumps on the top edge. Keep this shape wide rather than tall.
Start the drawing at the upper side of the frog and draw the entire side of the body and the lower body in a series of rounded arcs. Add raised eye-bumps at the two ends of the top of the head and then connect the inner edges of the two eye-bumps with a shallow rounded arc of a forehead. Leave plenty of room beside the body for the folded legs and below it for the leaf. Join the eye bumps to the outline rather than leaving them as floating circles.
Why this works
Different animals are best drawn starting with different animal shapes. Thus the bunny was started as a head on top of a body. The puppy was also started as a head on top of a body. The frog, however, starts with a low pose of one main shape: a low central mass that is made wider than it is tall. This main mass has two raised eye-bump shapes growing from the top edge of the mass.
+ Green: add− Red: erase
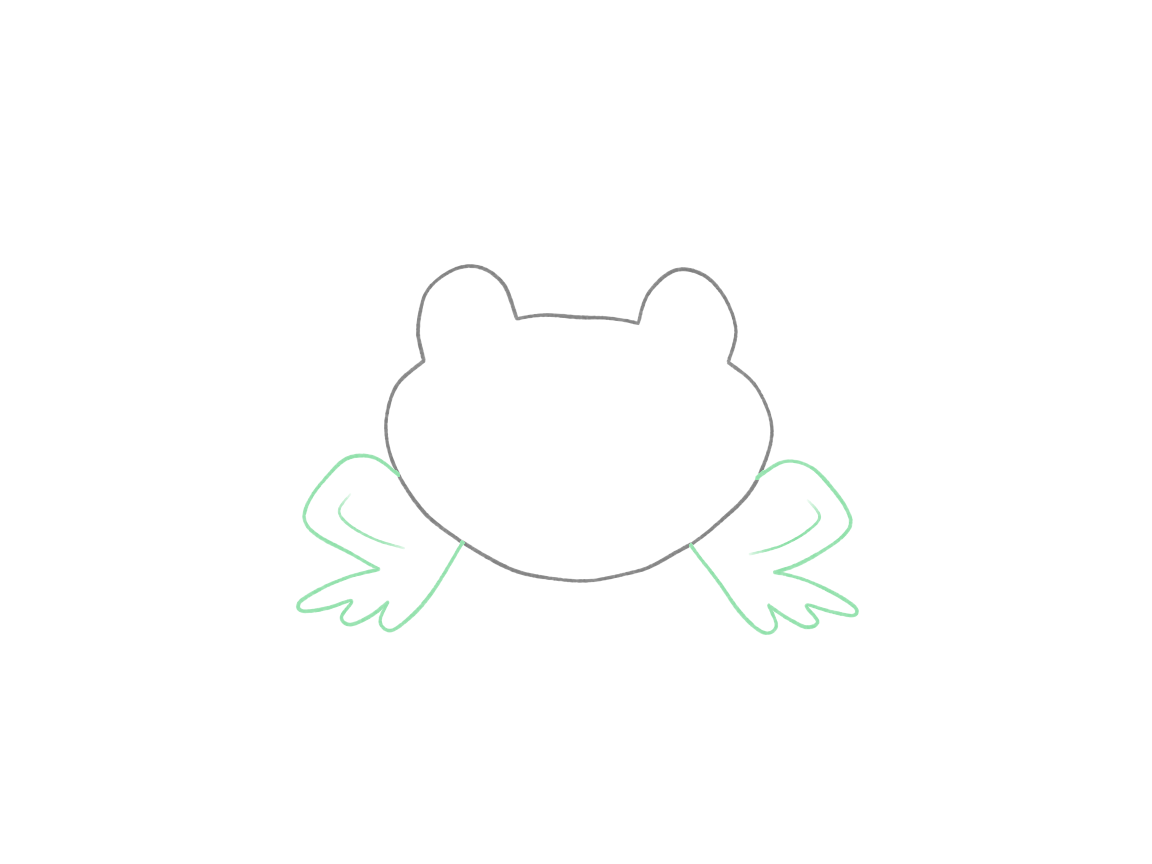
Add the folded back legs
Add a folded hind leg on each side of the body. Go out around the knee of each leg, then in at the ankle and draw a small foot pointing outward on that side. Add some soft toe tips. Stop the leg edges where they disappear behind the body.
Start drawing one of the back legs from the side of the frog’s body, drawing outward from the knee (which is fairly soft and rounded for a frog). Continue drawing the leg as it bends inward at the ankle, and then draw the foot (which is fairly low to the ground for a frog). Return the foot's inner edge to the body and stop where the body hides it. A short bent line inside the knee explains the fold. Draw the other leg the same way.
Why this works
The back leg of a frog is bent back on itself. To draw this, represent the back leg as three parts: the broad knee, the narrow inward bend and the low foot. Draw the three connected parts with separate short actions if that is easier. The body in front of the leg hides the inner connections, thus no lines are needed to represent these inside the body. As always slight differences between the two sides are allowed.
+ Green: add− Red: erase
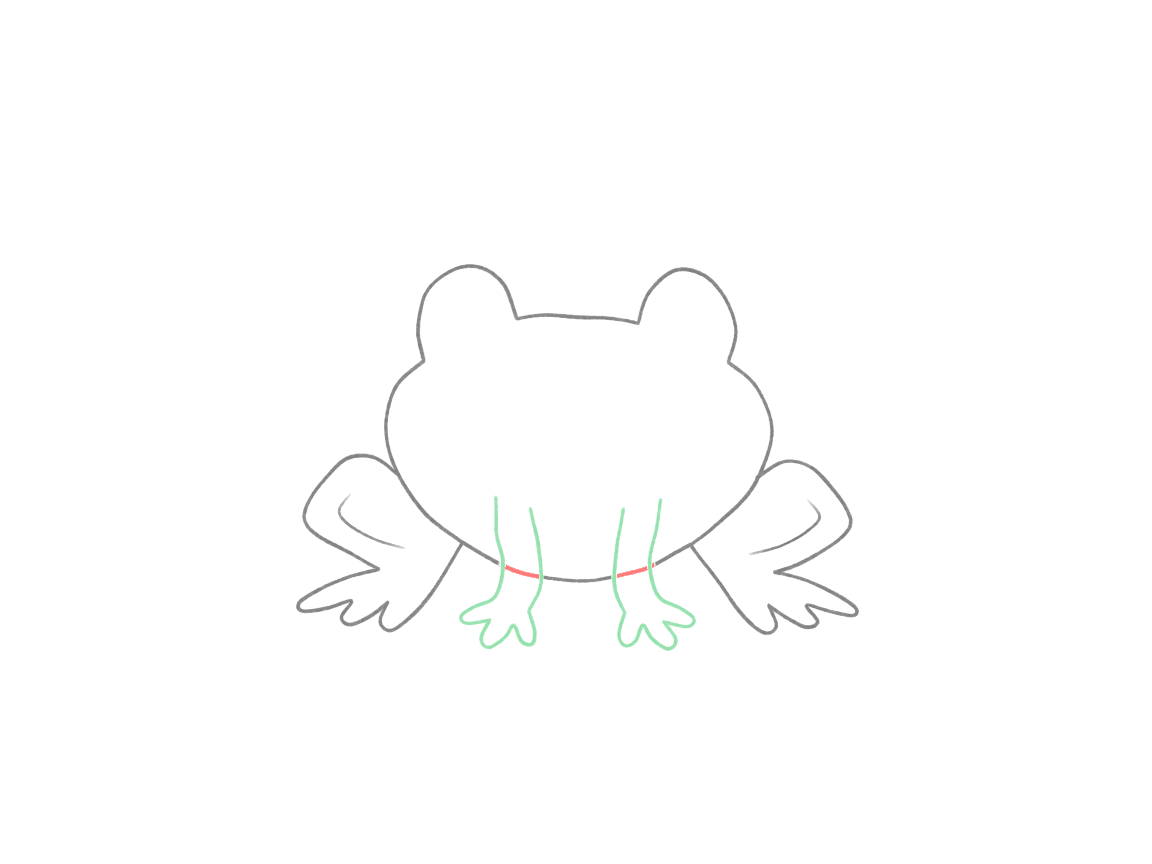
Add the front legs and feet
Add two short front legs drawn between the two wider back feet of the frog. Draw the ends of the front legs down in a slight V and let them spread out in a number of very soft pointed toes. The ends of the front legs should rest on the leaf as well as the two back feet of the frog.
Use the eraser back and forth over the short lower body arc behind each planned front limb to clear that crossing line. Start at the inside of the body and work downwards. Begin at the inside of the body and draw the front leg down in two parts: a limb and a toe. Work from the inside of the body outwards drawing down the limb in two parts – the limb itself and the toe end of the limb – and the toes spread out in soft pointed shapes. Return up the other side of each limb so its foot has a clear outline. The ends of the front limbs are nearest to us and will be resting on the leaf.
Why this works
The wide back legs of the frog are opposed to the short front limbs. The two front limbs of the frog can be drawn between the two wider back feet of the animal, and drawn at slightly different heights if they can all rest on the same surface. The nearer front feet can sit a little lower on the page. The simple feet of the animal need only to be drawn as blunt ends to the limbs or splayed out slightly.
+ Green: add− Red: erase
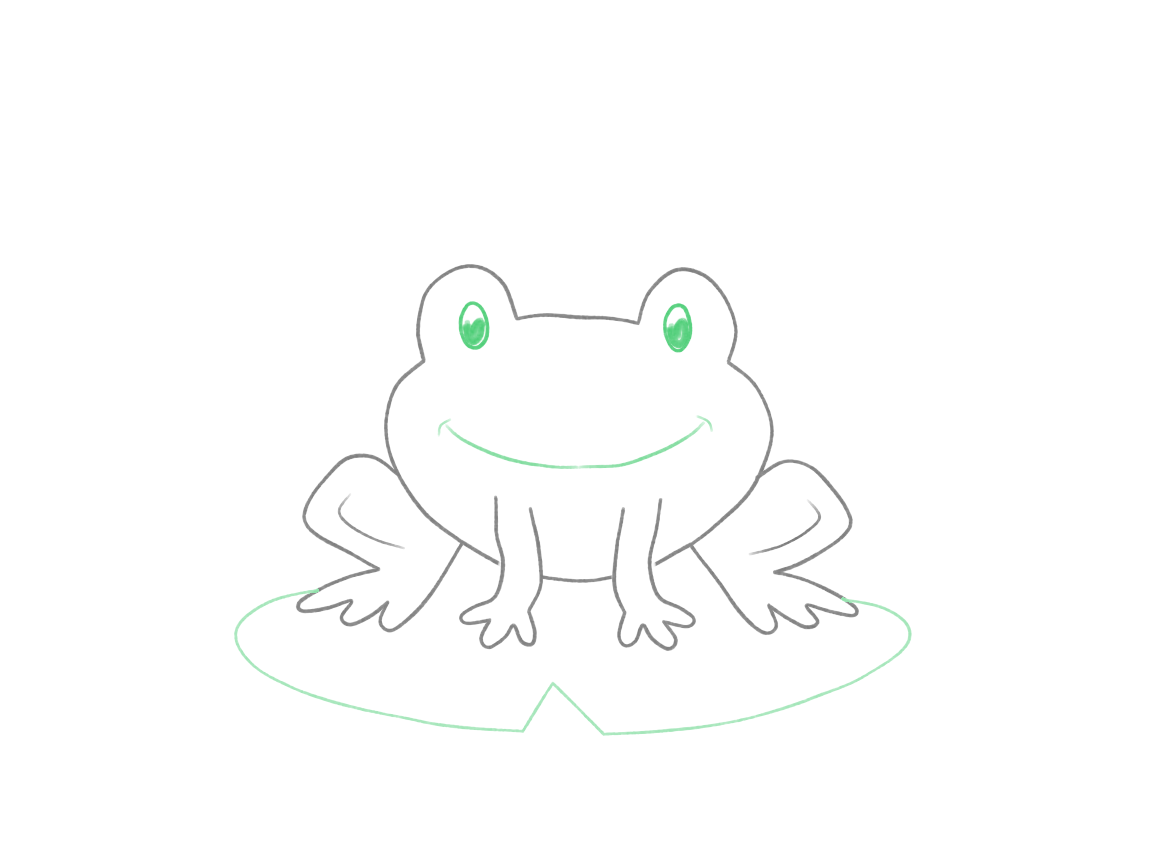
Add the face and lily pad
Complete the eyes and the mouth. Add a very flat lily pad (leaving its outline to be stopped behind the frog) with an open V-shaped notch in the near edge.
Add pupils to the raised eyes, making them into small ovals with a few short pencil strokes, leaving a tiny light fleck in each pupil if you like. Add a broad shallow smile to the mouth of the frog. Start the leaf on the side of a back foot and continue around the four feet in large arc movements. Add a V-shaped notch to the near edge of the leaf. Continue around the other side of the leaf and stop the rear edge where it disappears behind the frog, with all four feet inside the leaf area.
Why this works
An oval leaf looks flat when it is much wider across the page than it is deep from front to back. For this drawing you don’t need to draw the whole of the leaf as it will be hidden by the body of the frog. Be careful where you draw a line through a foot as this will place the leaf in the wrong position. Draw the line for the leaf until you reach the frog and then continue the line of the leaf as you reach the other side of the frog.
+ Green: add− Red: erase
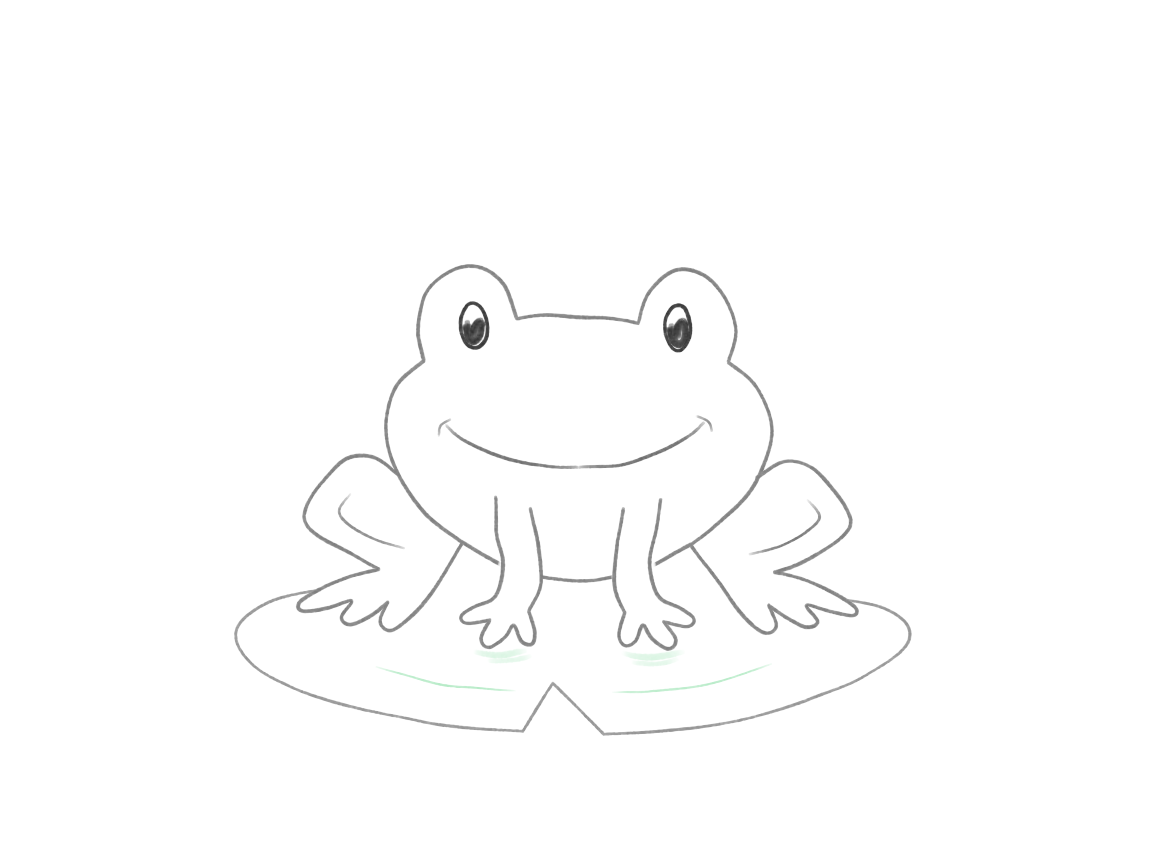
Clarify contact and overlaps
Check that your frog is sitting on the leaf. Get rid of any other crossing lines and add a small contact shadow if you feel it is necessary.
Follow the outline of the leaf edge and the leg attachment points to the surface. Make sure you are clearing a crossing line where you have one and keep the hidden background edges stopped at the foreground forms as shown in the demonstration. Adding a few light short strokes below the front feet to indicate contact is also acceptable. Two light leaf veins are also acceptable but are not necessary. Keep the body area largely white so the face and folded legs are easily visible.
Why this works
Most of the contact in this scene comes from where the forms meet. A little shadow near the feet can support the relationship of the forms, but it cannot repair a leaf drawn through the frog or a foot floating above the leaf. Make the forms visible first and then, if at all, add a little tone near the feet.
A few useful checks
- A round side shape by itself looks like another body. Make the side shape narrower at the bend, and add a small outward foot to the end to indicate a folded leg.
- Stop the rear lily-pad edge where the frog hides it. Do not draw a complete oval through the frog or its feet.
- Be sure the two front feet are between the two rear feet on the leaf.
Try a small change
Optional: make your own second version with a surprised face. Change only the eyes and mouth, while the rest of the animal remains the same including the body and the leaf that supports it.
Your drawings of a frog consist of a broad shape with folded back legs and feet resting on a surface. Their bodies and supporting leaf have been defined by a few changes of direction and a number of carefully stopped lines.
Guided lesson
You’ve followed the steps. Now find out how it went.
In the Draw Cute Animals course you draw this one and 5 more on our canvas, with Luna checking each step: what’s off, how to fix it, before you move on. Pay once and the lessons stay in your account.