Free tutorial · Lesson 3 of 6
How to Draw a Cute Puppy — Easy Step by Step
Draw a seated puppy with floppy ears. Draw him with a gently tilted head and ensure that the eyes, nose and mouth are all aligned to give him a very curious expression.
Skip to the stepsWatch the pencil strokes
Free replay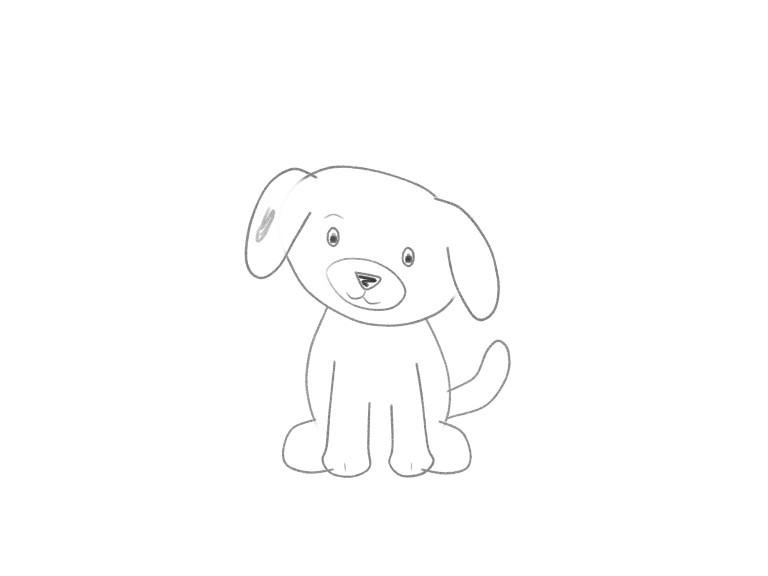
Enable JavaScript for the pencil replay. All drawing steps are available below.
What you’ll learn: The position of the facial features in relation to the tilt of the head creates the expression of the puppy.
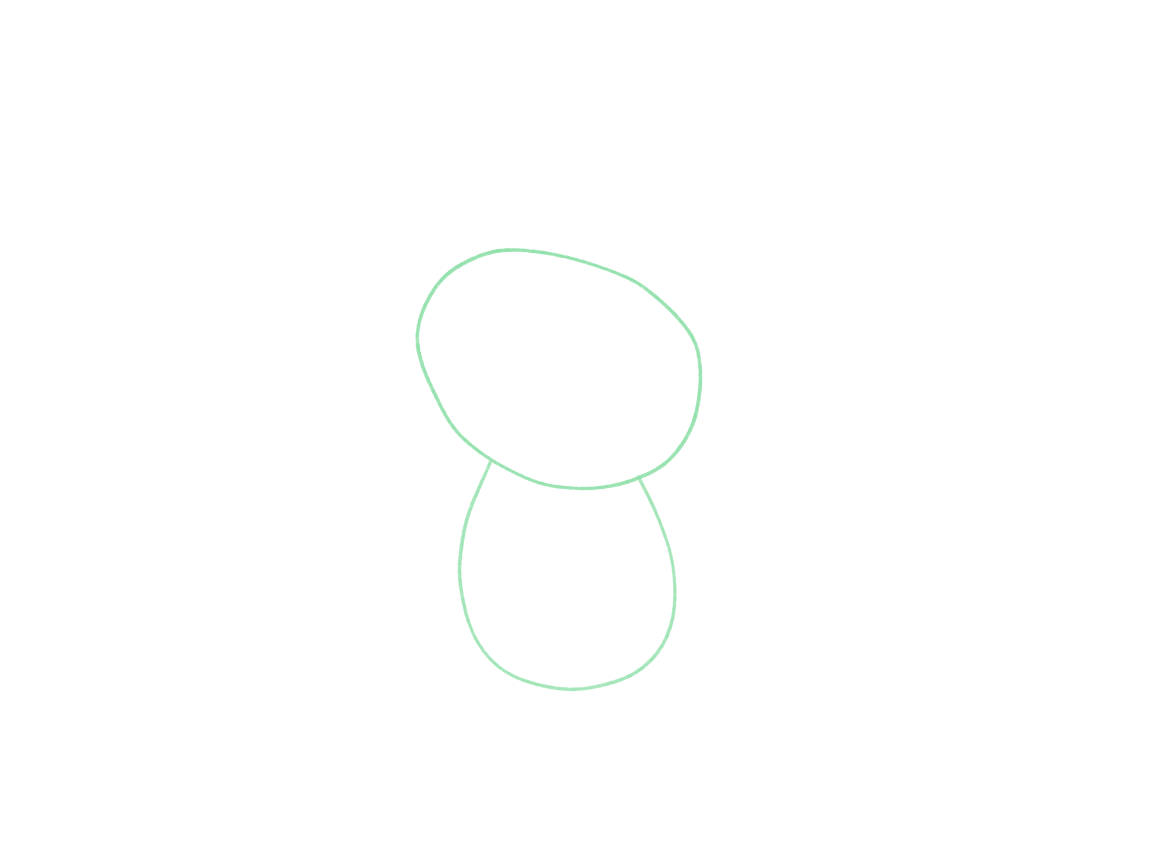
+ Green: add− Red: erase
Place the body and tilted head
Start with a larger rounded head with a gentle tilt to it, then draw the small upright seated body below it. The head and body of the puppy should connect.
Start with a broad rounded head. The top of the cheek drops off to one side and the lower cheek also drops off to the same side. The body is compact and is drawn as an upright mass. The sides of the body are drawn and then stopped at the head. Imagine one line between the future eye positions and another down the middle of the face. Both turn with the head. The demonstration uses imagined guides, with no extra guide marks to erase.
Why this works
You can even get an expression before you add a face. Look at how a small tilt in the head can change the appearance of the body. The head turns as a whole unit. Imagine a line across the eyes, and another running from the forehead toward the nose. The body can be straight up and down. You don’t need a lot of a tilt – just enough of a difference from horizontal. The more steeply tilted the head, the more difficult it will be to add the features for the face in this drawing lesson.
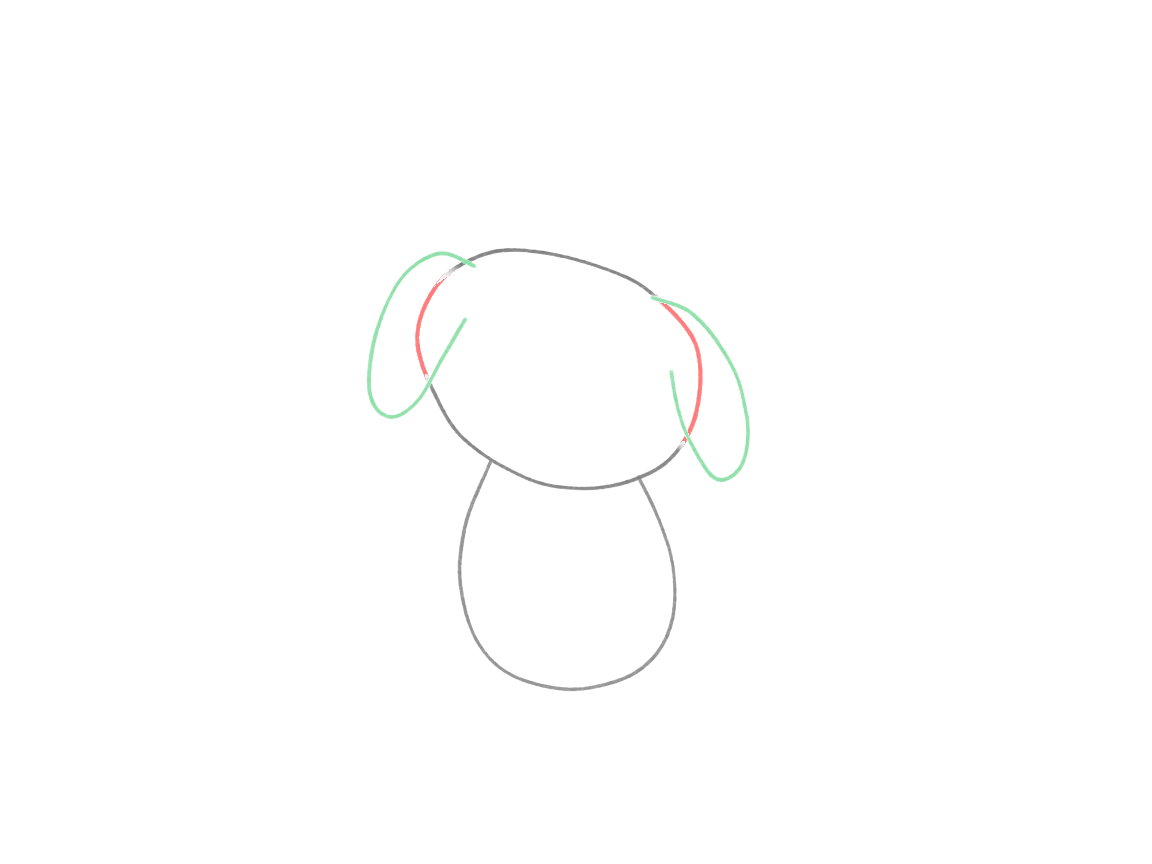
+ Green: add− Red: erase
Attach the floppy ears
Add two soft hanging ears to the head. Let their attachment heights follow the head's slope. One ear can also be longer or wider than the other if you like.
Erase the short part of the existing head edge that each ear will hide. The first hanging ear goes outward and down in a soft rounded tip. Then it goes back in towards the cheek in a soft curve to form the side of the ear. Draw the other hanging ear in the same way on the opposite side of the head at the height suggested by the head's tilt. The end of the inner ear should be connected to the side of the head.
Why this works
Two matching features on a tilted head do not always line up to form a horizontal line on the page. Because the character’s head is tilted, the two ear attachments also follow and can sit at different heights on the page. One ear can be longer or wider as a separate character choice. Note where each of the hanging ear attachments begin and return to on the head. The lines drawn to form the edge of the head that is not visible (hidden) should be erased.
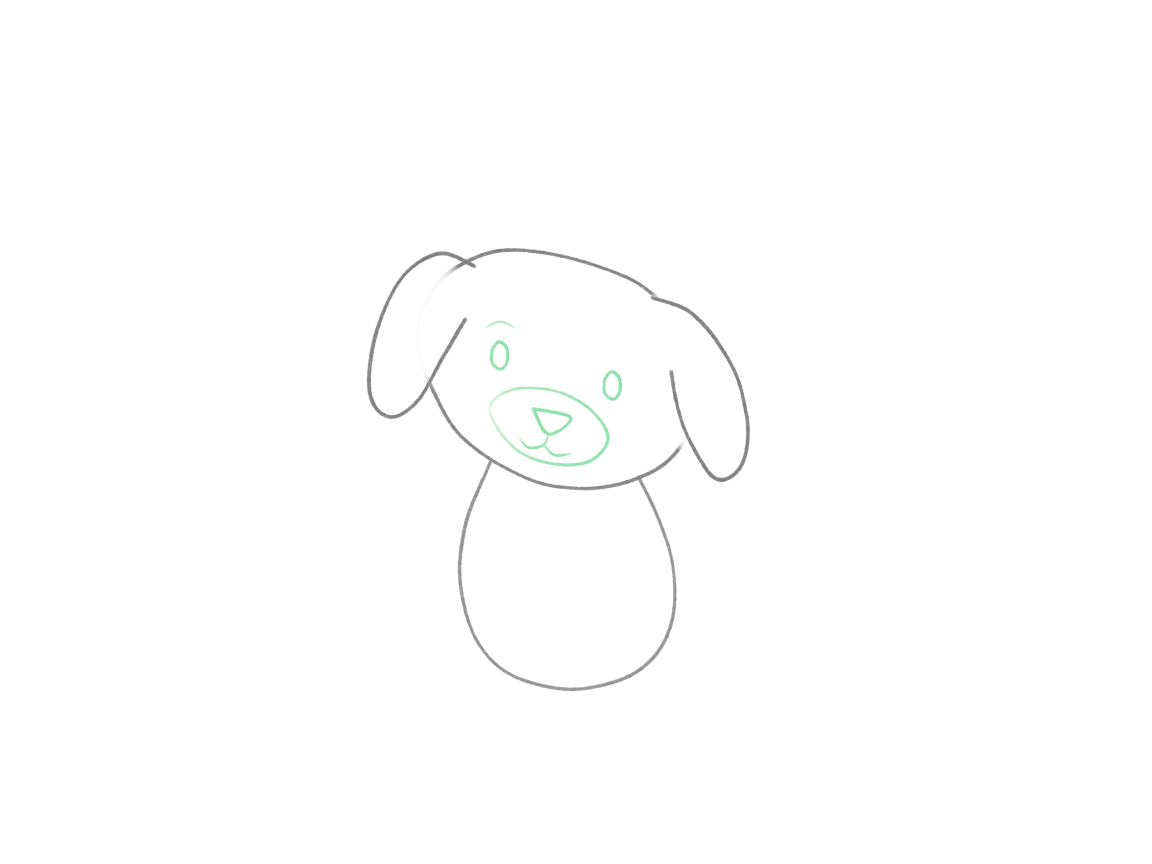
+ Green: add− Red: erase
Build the muzzle and face
Draw a small rounded muzzle in the lower-middle face. Draw eyes along the sloping eye line of the head. Draw a short nose on the end of the muzzle and a short mouth below the nose. A small rounded brow above the eyes is optional.
Draw a small rounded muzzle in the lower-middle face. The muzzle's long direction should follow the tilt of the head. The eyes should be on a sloping line, with the bottom eye being a little lower on the page than the top eye. The nose should be in the center of the muzzle and the mouth should be a short line below the nose. A small rounded brow is also shown in the example but this is optional.
Why this works
The muzzle is what holds the nose and mouth together. Instead of placing each feature on the page, place them in relation to the head. A sloping eye pair will create a very expressive face when paired with a sloping muzzle. Small inequalities are very natural in beginner drawings, just correct an individual feature if it contradicts the rest of the drawing as a whole as opposed to trying to make everything equal.
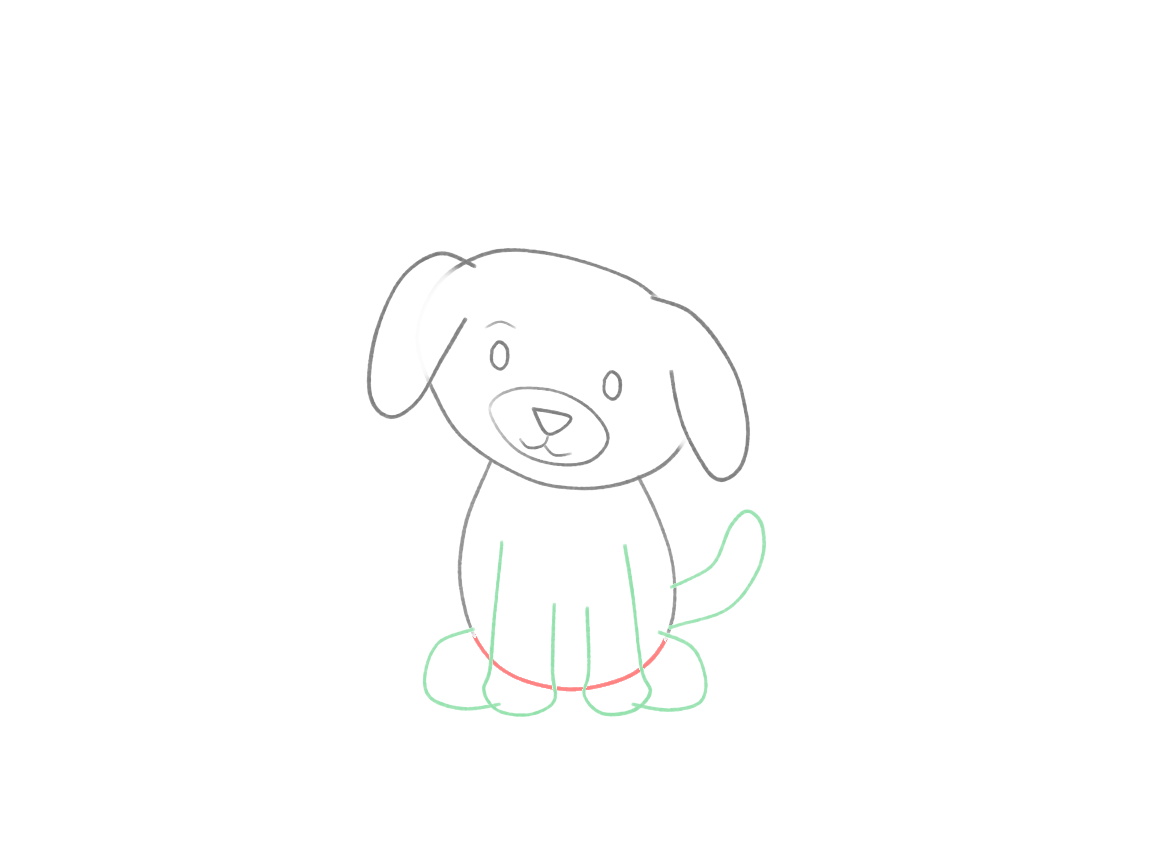
+ Green: add− Red: erase
Add the seated legs and tail
Two front legs with simple paws, a small back foot on each side and a tail at the back of the body draw attention to the drawing and help create the seat of the puppy.
Erase the lower body outline where the paws will replace it. Draw small back feet at either side, then two narrow front legs ending in broader paws between them. Use a few manageable strokes for each leg and paw. Draw a short tail rising from the rear side and returning behind the torso. Keep the paw bottoms near the same level; you do not need to draw a ground line or make every paw perfectly level.
Why this works
Drawing the paws to sit on the same ground level creates the sense of being supported by that surface, and even a slight difference in height between the front paws is okay. The front legs draw down from the chest, and the small back feet are drawn out to the sides. The tail draws behind the body of the puppy to avoid drawing another leg.
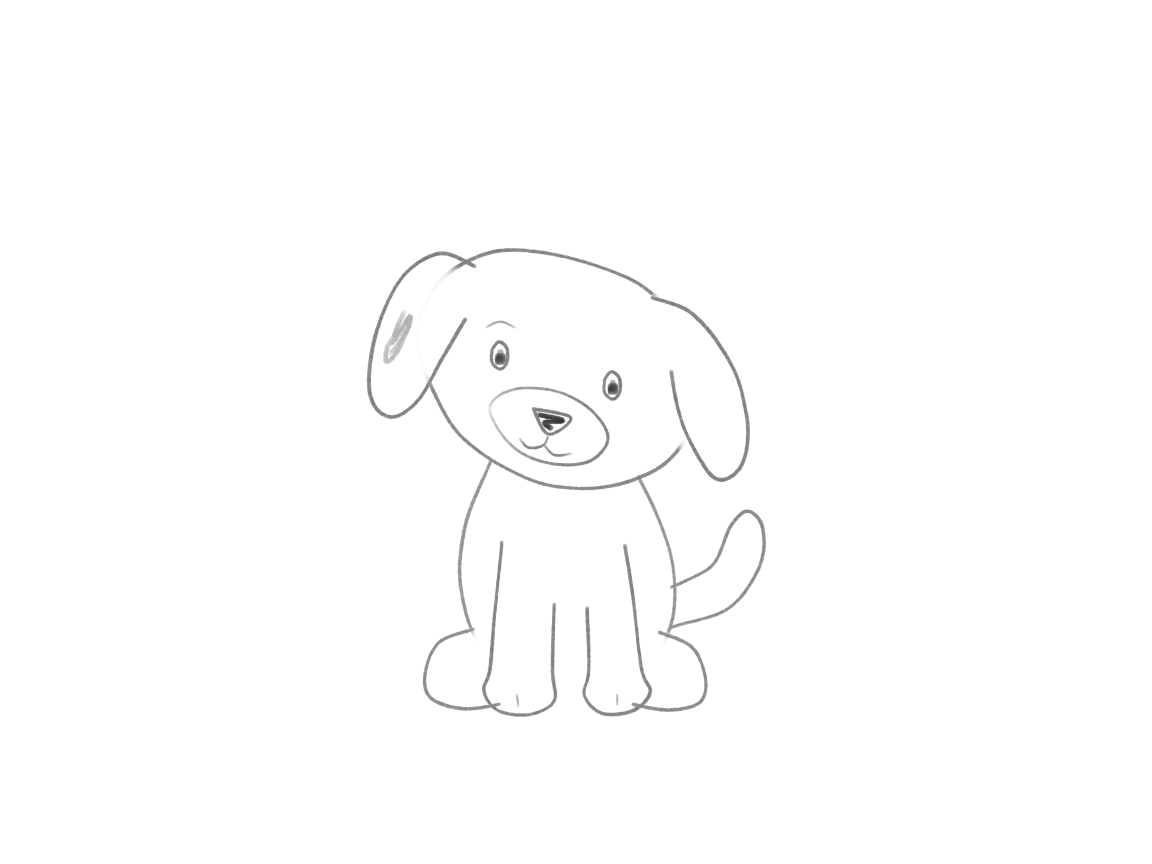
Add selective dark accents
Add some darker values to the pupils and nose with a few short strokes of the pencil. An ear patch is optional; use a few light strokes if you want one and keep the muzzle light.
Use firmer pressure or the softer pencil for these small details and draw short marks inside the nose and pupils instead of covering up the whole face. Also add a few short marks for a coat patch on the ear (if you chose to draw it) by doing short back and forth strokes inside one of the flaps. If you choose to draw a paw crease, only draw it if it helps. Check your drawing to make sure the face is still tilted correctly.
Why this works
These small accent markings draw the attention of the viewer to the features of the face and can be used to draw emphasis to the eyes and nose of the face. The rest of the muzzle should remain mostly untouched paper with the mouth clearly visible. If shading hides a feature, lighten that area rather than darkening everything else. A coat patch is also an option to use as character recognition.
A few useful checks
- Consider how an eye line would fall across the puppy’s head rather than drawing a horizontal line across the page.
- Make sure each floppy ear is attached to the head and does not appear to be floating in space next to the head.
- Keep the visible paws near one ground level.
Try a small change
(For Optional work) Draw a small second puppy with the same tilted face and seated body as above. Change its ears to short upright ears in contrast to the floppy ones in the first seated puppy.
Your puppy looks at you with a tilted head, a following face and a seated body. He expresses himself in all of these forms simultaneously and now you can change the form of his ears without recreating the entire puppy.
Guided lesson
You’ve followed the steps. Now find out how it went.
In the Draw Cute Animals course you draw this one and 5 more on our canvas, with Luna checking each step: what’s off, how to fix it, before you move on. Pay once and the lessons stay in your account.